How to Smoke Baby Back Ribs?
On this page (8 sections)
To smoke baby back ribs, you’ll want to cook them low and slow, maintaining a consistent temperature around 225-250°F until they reach tender perfection. The key is patience and a good rub for that delicious flavor. This method ensures your ribs are fall-off-the-bone delicious every time.
You might be wondering about wood types or different techniques for seasoning. We understand; there are so many options out there, it can feel a little overwhelming, right? We found that focusing on a few core steps makes all the difference. Your family and friends will thank you for mastering this barbecue favorite.
- Choose the right ribs.
- Prepare them properly.
- Apply a flavorful rub.
- Maintain consistent smoker temperature.
- Achieve perfect tenderness.
Let’s walk through exactly how to smoke baby back ribs, step by step, so you can achieve barbecue glory in your own backyard.
Preparing Your Baby Back Ribs for the Smoker
Getting your ribs ready is perhaps the most critical first step for a perfect cook. You want to make sure they’re clean and prepped before any seasoning goes on.
Choosing the Right Ribs
When you’re at the store, look for ribs that are meaty and uniform in thickness. This helps them cook evenly. Avoid racks with very thin or very thick spots. Fresh ribs should have a nice pink color. Skip any that look gray or discolored (USDA).
You might see terms like “spares” or “St. Louis style.” For this guide, we’re focusing on baby back ribs. They’re shorter, curved, and come from the upper part of the rib cage, closer to the loin.
Prepping Your Ribs: The Essential Steps
There are a few quick steps you’ll want to take before applying your rub. These ensure a better texture and flavor.
Removing the Membrane
This is a big one. On the bone side of your ribs, you’ll find a thin, silvery membrane. If you leave it on, your ribs can turn out tough and chewy. It also prevents your rub from getting to the meat.
To remove it, we found it’s easiest to use a paper towel for grip. Slide a knife under the membrane on one end of the rack. Lift it up, grab it with the paper towel, and pull it firmly off the bones. It might come off in one big piece, or you might need to do it in sections.
Trimming Excess Fat
While some fat is good for flavor and moisture, too much can make your ribs greasy. Look for any large, thick pockets of fat on either side of the ribs. Trim these down with a sharp knife. You don’t need to be super aggressive; just get rid of the obvious excess. We’re aiming for that balance of flavor without the grease.
Flavoring Your Ribs: The Rub and Binder
This is where you start to build that delicious bark and deep flavor. A good rub makes all the difference.
Applying a Binder
Before the rub, many pitmasters use a “binder.” What’s a binder? It’s a thin layer of liquid that helps the rub stick to the meat. It also creates a moist surface that can contribute to a better bark during the smoking process.
Common binders include yellow mustard, olive oil, or even a little apple cider vinegar. Don’t worry, you won’t taste the mustard in the end product. It just does a great job. Apply a thin, even coat all over the ribs.
Crafting or Choosing Your Dry Rub
Now for the star of the show: the dry rub. This is a blend of spices that seasons the meat and forms a flavorful crust. You can buy pre-made rubs, and many are excellent. Or, you can make your own. We found that a good homemade rub often has a better, fresher taste.
A basic rib rub often includes:
- Paprika (for color and flavor)
- Brown sugar (for sweetness and bark)
- Salt
- Black pepper
- Garlic powder
- Onion powder
- Cayenne pepper (for a little kick, if you like)
Be generous with your rub. Sprinkle it evenly over all surfaces of the ribs, pressing it gently to ensure it adheres well. Let the ribs sit with the rub on for at least 30 minutes at room temperature, or up to several hours in the refrigerator. If refrigerating, let them come closer to room temperature before smoking (FoodSafety.gov).
Setting Up Your Smoker for Ribs
Consistent temperature is king when smoking ribs. You want a low, steady heat for tenderness.
Maintaining the Ideal Temperature
For baby back ribs, the sweet spot for smoking is generally between 225°F and 250°F. This low and slow approach breaks down the tough connective tissues in the meat, making them incredibly tender.
It’s important to monitor your smoker’s temperature, not just rely on its built-in gauge. Consider using a separate, accurate thermometer placed near your ribs. We found that this helps avoid hot spots or cool zones that can lead to uneven cooking.
Choosing Your Wood for Smoke Flavor
The type of wood you use will significantly impact the flavor of your ribs. Each wood offers a unique profile.
Here’s a quick guide to popular choices:
| Wood Type | Flavor Profile | Good For Ribs? |
|---|---|---|
| Hickory | Strong, bacon-like, savory | Yes, very popular |
| Apple | Mild, fruity, slightly sweet | Yes, excellent choice |
| Cherry | Mild, fruity, beautiful red color | Yes, often blended |
| Pecan | Mild, nutty, subtle | Yes, great all-around |
| Oak | Medium, earthy, clean smoke | Yes, good base wood |
We often recommend starting with a milder wood like apple or cherry, especially if you’re new to smoking. You can also blend woods, like hickory and apple, for a more complex flavor. Avoid mesquite for ribs; its strong flavor can easily overpower them.
The Smoking Process: Low and Slow
Patience is truly a virtue here. Smoking ribs isn’t a quick meal, but the results are worth the wait.
Placing Ribs in the Smoker
Once your smoker is at temperature and producing clean, thin blue smoke (not thick, white billows), it’s time to add your ribs. Place them bone-side down on the grates. Make sure there’s space between each rack for smoke to circulate properly. Don’t overcrowd your smoker.
The 3-2-1 Method for Ribs
Many people follow what’s called the “3-2-1 method” for baby back ribs. It’s a popular guideline, not a strict rule. This method provides a good balance of smoke, tenderness, and bark.
Phase 1: 3 Hours of Smoke
For the first three hours, your ribs will just sit in the smoker, absorbing that beautiful smoke flavor. Keep the temperature steady at 225-250°F. Don’t open the lid too often; “if you’re looking, you’re not cooking!” This phase builds the bark.
Phase 2: 2 Hours Wrapped
After three hours, take your ribs out. Wrap each rack tightly in foil, or even better, peach butcher paper. You can add a little liquid inside the foil for extra moisture – apple juice, cider vinegar, or even a pat of butter. This phase helps tenderize the ribs, making them incredibly moist. We found that this really pushes them towards that “fall-off-the-bone” texture.
Phase 3: 1 Hour Unwrapped
Unwrap the ribs and place them back on the smoker for the final hour. This step allows the bark to firm up again and helps any barbecue sauce you apply to set nicely. If you’re using sauce, apply it during this last hour, about 30 minutes before they’re done. This prevents the sauce from burning.
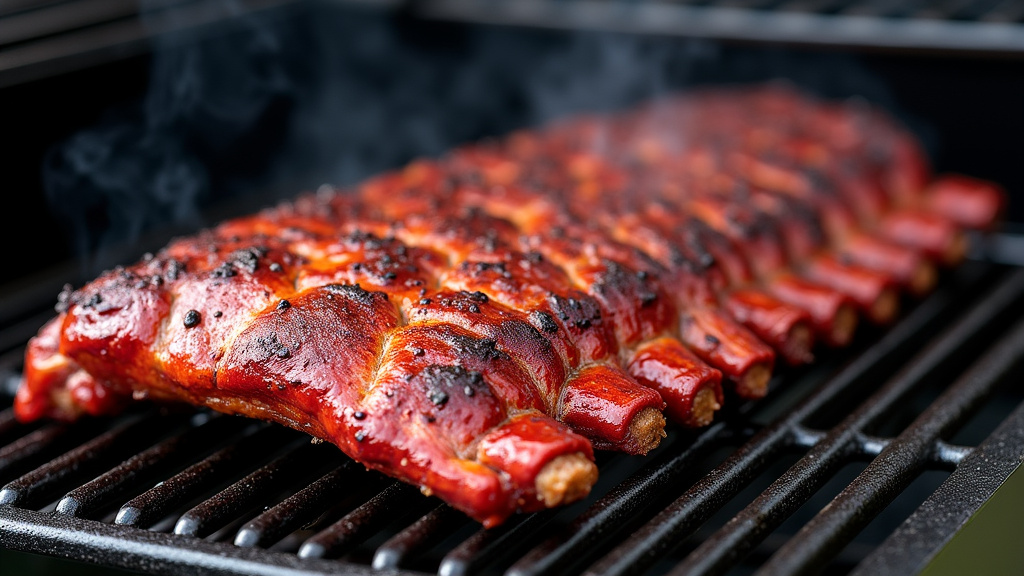
Achieving Perfect Doneness
How do you know when your ribs are truly ready? It’s not just about time; it’s about feel and appearance.
Testing for Tenderness
There are a few reliable ways to check for doneness:
- The Bend Test: Pick up a rack of ribs with tongs in the middle. If they’re done, they should bend significantly and start to crack, but not break apart completely.
- The Twist Test: Grab a bone at one end of the rack and twist it. If it turns easily or starts to pull away from the meat, your ribs are likely ready.
- Probe Tender: Insert a skewer or toothpick into the meat between the bones. It should go in with very little resistance, like sliding into soft butter. This is a great indicator of tenderness (USDA).
Many experts say cooked ribs should reach an internal temperature of at least 145°F, but for true tenderness, they’ll usually be closer to 190-205°F (USDA). Don’t stress too much about the exact internal temperature for tenderness; the feel tests are often more important for ribs.
Resting and Serving Your Ribs
The final, crucial step before you dig in.
The Importance of Resting
Once your ribs are perfectly tender, resist the urge to cut into them immediately. Just like other meats, ribs benefit from a rest. This allows the juices to redistribute throughout the meat, making them more succulent and flavorful. Loosely tent them with foil and let them rest for 15-20 minutes.
Carving and Enjoying
After resting, carve your ribs between the bones into individual or two-bone portions. Serve them as they are, or with extra barbecue sauce on the side. Get ready for some rave reviews! You’ve just created a masterpiece.
Your Rib Smoking Checklist
To help you keep track, here’s a quick checklist for smoking baby back ribs:
- Choose meaty, uniform ribs.
- Remove the membrane from the bone side.
- Trim excess fat.
- Apply a binder (like mustard) and a generous dry rub.
- Preheat smoker to 225-250°F.
- Use appropriate wood for smoke flavor.
- Smoke for 3 hours (unwrapped).
- Wrap and smoke for 2 hours.
- Unwrap and smoke for 1 hour (add sauce if desired).
- Perform bend or twist test for tenderness.
- Rest ribs for 15-20 minutes before serving.
Conclusion
You’ve now got the playbook for smoking incredible baby back ribs. Remember, it’s all about choosing good ribs, prepping them right, and staying patient with the smoke and temperature. We found that attention to these details makes all the difference for tender, flavorful results.
Don’t be afraid to experiment with different rubs or wood types as you gain confidence. Each step builds towards that perfect bite. Now, go fire up your smoker and enjoy the delicious rewards of your efforts!
Frequently Asked Questions
What if my ribs aren’t “fall-off-the-bone” tender?
If your ribs aren’t as tender as you’d like, they likely needed more time in the wrapped phase or a slightly higher temperature during that stage. Next time, try extending the wrapped period by an extra 30-60 minutes. You can also ensure your smoker maintains a consistent temperature throughout the cook.
Can I use frozen ribs?
Yes, you can smoke frozen ribs, but they must be fully thawed before you begin. Thaw them slowly in the refrigerator for at least 24-48 hours, depending on their thickness. Smoking partially frozen ribs will lead to uneven cooking and can affect tenderness.
How do I prevent my ribs from drying out?
Several things help prevent dry ribs. Using a binder and generously applying rub helps seal in moisture. The wrapped phase (the “2” in 3-2-1) is also crucial for keeping them moist. We also found that using a water pan in your smoker adds humidity, which can be very beneficial.
What’s the best way to store leftover smoked ribs?
Allow any leftover ribs to cool completely, then wrap them tightly in foil or place them in an airtight container. They’ll stay fresh in the refrigerator for 3-4 days. For longer storage, you can freeze them for up to 2-3 months.
Do I really need to remove the membrane?
While technically you can leave it on, we highly recommend removing the membrane. It’s tough and chewy, and it prevents your delicious rub and smoke from flavoring that side of the meat. Taking it off only takes a minute and greatly improves the eating experience.