What Is the 3-2-1 Method for Ribs?
On this page (8 sections)
The 3-2-1 method for ribs is a popular technique for smoking baby back or spare ribs to achieve incredibly tender, juicy, and flavorful results. It involves three distinct stages of cooking: three hours unwrapped, two hours wrapped, and one final hour unwrapped.
This method helps you get that perfect, fall-off-the-bone texture that everyone loves. Many pitmasters use it to ensure their ribs are consistently moist. You might be surprised how easy it is to master this approach for your next BBQ.
- Achieve tender, juicy ribs.
- Smoke ribs in three stages.
- Learn specific timing for each stage.
- Get that desirable “fall-off-the-bone” texture.
Ready to smoke some amazing ribs? Let’s walk through exactly how the 3-2-1 method works step by step, so you can impress your friends and family.
Understanding the 3-2-1 Rib Smoking Method
The 3-2-1 method is a straightforward approach to smoking ribs. It breaks down the cooking into three distinct time segments: 3 hours, 2 hours, and 1 hour. This creates incredibly tender ribs with a beautiful smoky flavor and a nice bark.
Think of it like a journey for your ribs, where each stage brings them closer to perfection. You’re controlling temperature and moisture to get that ideal “fall-off-the-bone” texture without them turning to mush.
Why Does the 3-2-1 Method Work So Well?
This method works by strategically applying different cooking environments. You start with smoke, then move to a moist braise, and finish with a slight crisping. Each step has a purpose. We found that this balance is key to amazing results.
Many experienced pitmasters rely on this technique for its consistency. It takes a little guesswork out of smoking, making it perfect for both beginners and seasoned grillers.
Preparing Your Ribs for the 3-2-1 Method
Before you even think about lighting your smoker, you need to prepare your ribs. This step is just as important as the smoking itself. Proper prep ensures an even cook and fantastic flavor penetration.
Don’t rush this part. A few extra minutes here can make a big difference in the final product. It’s like preparing a canvas before painting a masterpiece.
Choosing the Right Ribs
The 3-2-1 method is typically used for pork spare ribs or baby back ribs. Spare ribs are larger and meatier, while baby backs are leaner and cook a bit faster. Either will work wonderfully.
Look for ribs with good meat coverage and some marbling. Freshness is key for the best flavor. We always recommend getting them from a butcher you trust.
Removing the Membrane
This step is non-negotiable. On the back of the ribs, there’s a thin, silvery membrane. If you don’t remove it, your ribs will be tough and chewy. It also prevents your rub from penetrating the meat.
To remove it, use a butter knife to lift a corner of the membrane. Then, grip it with a paper towel and pull it off. It usually comes off in one piece. If it tears, just start a new section.
Applying the Rub
A good dry rub is essential for flavor. It forms the “bark” during the smoking process. Be generous with your rub application, covering all sides of the ribs.
There are countless rub recipes out there. Many people prefer a mix of sweet, savory, and a little spice. Apply the rub at least 30 minutes before smoking, or even better, an hour or two. This allows the flavors to sink in.
The Three Stages of 3-2-1 Rib Smoking
Now for the main event! The 3-2-1 method is broken down into three distinct phases. Each phase plays a vital role in creating those perfect ribs. You’ll need a smoker that can maintain a consistent temperature, typically around 225-250°F (107-121°C).
Maintaining a steady temperature is perhaps the most important part of this whole process. Temperature fluctuations can lead to uneven cooking. This is where your smoker skills really come into play.
Stage 1: The “3” Hours (Smoking Unwrapped)
This is where your ribs get their beautiful smoky flavor and color. For the first three hours, your ribs are exposed directly to the smoke. This helps create that delicious bark we all love.
Place your ribs bone-side down directly on the grates. Keep your smoker temperature between 225-250°F. Add your chosen wood chips or chunks (like apple, cherry, or hickory) to generate smoke.
During this stage, don’t open the smoker too often. “If you’re looking, you’re not cooking,” as the old saying goes. Let the smoke do its work!
Choosing Your Wood
The type of wood you use will greatly influence the flavor of your ribs. Apple and cherry woods give a milder, sweeter smoke, while hickory and mesquite are stronger. Many people prefer a mix. It’s all about personal preference.
Experiment to find your favorite. Just be sure to use wood specifically for smoking, not treated lumber.
Stage 2: The “2” Hours (Foil Wrapped)
After three hours, it’s time to wrap those ribs. This stage is all about tenderness and moisture. Wrapping the ribs in foil creates a moist, steaming environment, helping to break down connective tissues.
Carefully remove the ribs from the smoker. Place each rack on a large piece of heavy-duty aluminum foil. Many people add a liquid to the foil package – apple juice, beer, or even a bit of barbecue sauce. This adds moisture and flavor.
Wrap the ribs tightly, sealing the edges to prevent steam from escaping. Return them to the smoker for two more hours at the same temperature (225-250°F).
| Stage | Duration | Method | Purpose |
|---|---|---|---|
| 1 (3-hour) | 3 hours | Unwrapped, in smoker | Smoke penetration, bark formation |
| 2 (2-hour) | 2 hours | Wrapped in foil (with liquid) | Tenderizing, moisture retention |
| 3 (1-hour) | 1 hour | Unwrapped, in smoker (sauced) | Setting sauce, finishing bark |
Stage 3: The “1” Hour (Unwrapped and Sauced)
The final hour is for finishing your ribs. Carefully unwrap the ribs, discarding the foil and any liquid. This is your chance to apply your favorite barbecue sauce, if you choose to use one.
Return the unwrapped ribs to the smoker for the last hour. This allows the sauce to caramelize and thicken. It also helps to firm up any softened bark from the wrapping stage. Some people prefer their ribs sauceless; that’s perfectly fine too!
During this final stage, keep an eye on the ribs. Sugary sauces can burn if the temperature is too high. You want a nice sticky glaze, not a crispy char.
Checking for Doneness: Are Your Ribs Ready?
After the 3-2-1 timing is up, how do you know if your ribs are truly done? The “fall-off-the-bone” description is a good goal, but you don’t want them to be mushy. We found that there are a few reliable tests.
It’s important to trust your instincts here, as every rack of ribs and every smoker can be a little different. These checks will help you decide.
- The Bend Test: Pick up a rack of ribs with tongs in the middle. If the ribs are done, they will bend significantly, and the surface meat will start to crack. They shouldn’t be stiff.
- The Toothpick Test: Insert a toothpick between the bones. It should slide in with very little resistance, like it’s going into soft butter.
- The Bone Wiggle Test: Grab an exposed bone on one end and wiggle it. If it feels loose and like it wants to pull away from the meat, your ribs are likely ready.
- Internal Temperature (Optional): While texture is often a better indicator for ribs, an internal temperature around 195-203°F (90-95°C) is generally where the connective tissues have broken down for maximum tenderness (USDA).
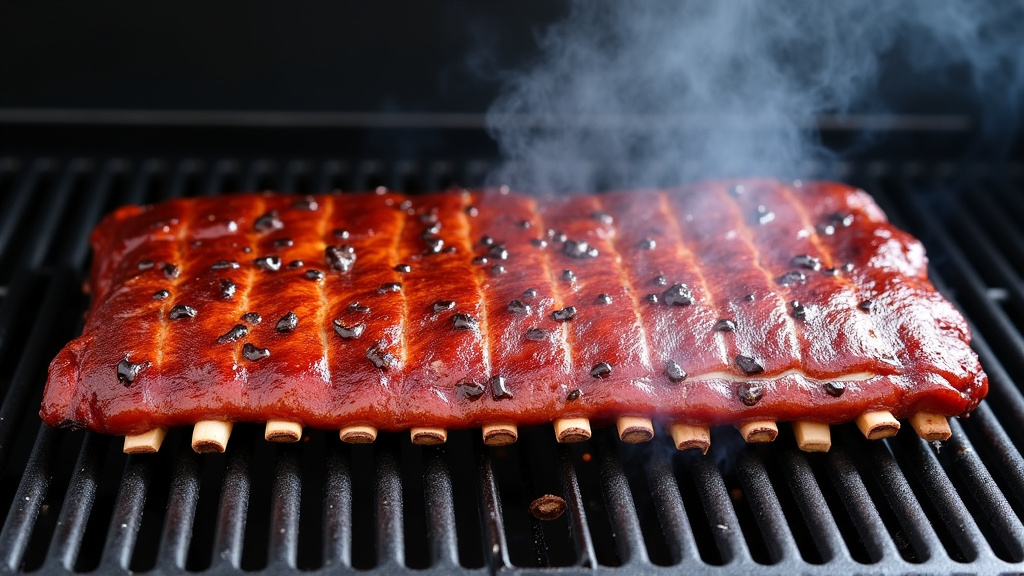
Resting Your Ribs
Once your ribs are done, resist the urge to cut into them immediately. Just like a good steak, ribs benefit from a resting period. This allows the juices to redistribute throughout the meat, keeping them moist and flavorful.
Transfer the ribs to a cutting board. You can loosely tent them with foil for about 15-20 minutes. Then, slice and serve! This small pause makes a big difference.
Your 3-2-1 Rib Checklist
To help you on your way to rib perfection, here’s a quick checklist to ensure you’ve covered all the bases:
- Have you removed the membrane from the back of the ribs?
- Is your favorite dry rub applied generously to all sides?
- Is your smoker preheated and maintaining a steady 225-250°F?
- Do you have your chosen wood for smoking ready?
- Is heavy-duty foil and a liquid (like apple juice) prepared for the wrapping stage?
- Is your favorite BBQ sauce ready to go for the final hour?
Conclusion
The 3-2-1 method offers a reliable path to perfectly smoked ribs. You’ve learned how each stage—the initial smoke, the tenderizing wrap, and the final saucing—contributes to that irresistible flavor and texture. By mastering preparation, maintaining consistent temperatures, and trusting the doneness tests, you’re well on your way.
Smoking ribs doesn’t have to be intimidating. This method simplifies the process, letting you consistently achieve that desirable “fall-off-the-bone” result. Now, gather your supplies, fire up your smoker, and get ready to enjoy some truly amazing ribs!
Frequently Asked Questions
Can I use the 3-2-1 method for beef ribs?
While the 3-2-1 method is designed for pork ribs, you can adapt it for beef ribs. Beef ribs, especially short ribs, are often meatier and may require a longer cooking time, perhaps a 4-2-1 or 5-2-1 approach, depending on their size and thickness. Always check for tenderness with the bend or probe test.
What if my ribs are done before the 3-2-1 timing is complete?
The 3-2-1 timing is a guideline, not a strict rule. Always prioritize the internal temperature and tenderness checks over the clock. If your ribs pass the bend or wiggle test earlier, they are ready. Remove them from the smoker to prevent them from becoming overcooked or mushy.
Do I have to add liquid when wrapping the ribs in foil?
No, you don’t absolutely have to add liquid, but it’s highly recommended. The liquid helps create a steamy environment inside the foil. This helps break down connective tissues more effectively and adds moisture, contributing to that incredibly tender result.
What temperature should I aim for in my smoker for the 3-2-1 method?
For the 3-2-1 method, you should aim to maintain a consistent smoker temperature between 225-250°F (107-121°C) throughout all three stages. Consistency is key to ensure the ribs cook evenly and achieve the desired tenderness and smoky flavor.
My ribs aren’t “falling off the bone.” What went wrong?
If your ribs aren’t as tender as you’d like, they likely needed more cooking time, particularly in the wrapped stage. Ensure your smoker maintained a consistent temperature. Next time, allow for slightly longer cooking in the foil, or use the bend and wiggle tests to confirm doneness before the final stage.