How to Smoke Ribs without Drying Them Out?
On this page (3 sections)
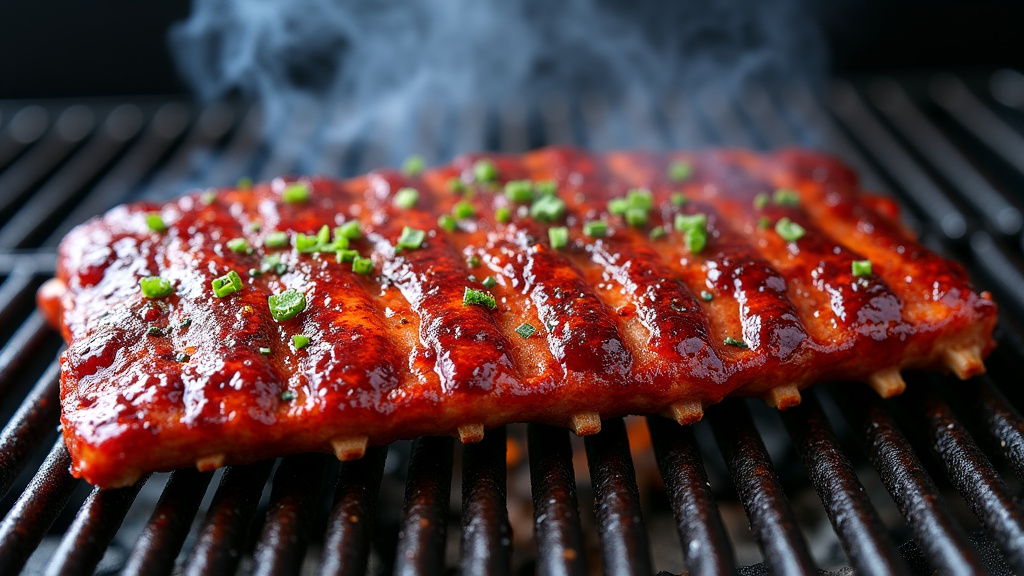
To smoke ribs without drying them out, maintain a consistent low temperature (around 225-275°F) and use a water pan to add moisture to your smoker. Wrapping the ribs in foil for part of the cook, often called the “Texas Crutch,” also helps keep them moist and tender.
Nobody wants tough, dry ribs after hours of smoking. You’re aiming for that perfect balance: tender, juicy meat that pulls cleanly from the bone, with a delicious smoky flavor. We found that managing humidity and temperature are your two biggest allies in this mission.
- Keep smoker temperature low and steady.
- Always use a water pan for moisture.
- Wrap ribs in foil (the “Texas Crutch”).
- Don’t overcook – cook to tenderness, not just time.
Let’s walk through exactly how to achieve those fall-off-the-bone, juicy ribs every time, step by step.
Achieving Perfectly Juicy Ribs: Your Step-by-Step Guide
Smoking ribs that are consistently juicy and tender is absolutely achievable. It’s all about understanding a few key principles and applying them with a little patience. We’ll break down the process into manageable steps for you.
Understanding Your Smoker: The Heart of the Operation
Your smoker is your best friend in this process. Knowing how it works and how to control its temperature is crucial for preventing dry ribs.
Temperature Control is King
Maintaining a steady, low temperature is perhaps the most important factor for juicy ribs. We found that a range of 225-275°F (107-135°C) is ideal. Higher temperatures cook the ribs too fast, squeezing out moisture and leaving you with dry, tough meat.
Use a reliable thermometer. Many smokers have built-in gauges, but often these can be inaccurate. We recommend a good quality, separate probe thermometer placed near your ribs to get an accurate reading of the cooking environment.
The Role of a Water Pan
A water pan is a simple yet powerful tool for keeping your ribs moist. It adds humidity to the cooking chamber. This helps prevent the surface of the ribs from drying out and creates a more forgiving environment.
Place a pan of hot water in your smoker from the beginning. Refill it as needed during longer cooks. Some pitmasters even add apple juice or beer for extra flavor, though water alone does the trick for humidity.
Rib Selection and Preparation: Setting the Stage
Before the smoke even starts, how you choose and prepare your ribs makes a big difference in the final product.
Choosing the Right Ribs
For smoking, you’ll typically choose between baby back ribs or spare ribs (which can be trimmed into St. Louis style). Baby backs are leaner and cook faster. Spare ribs have more fat and connective tissue, which can render down beautifully for incredible tenderness.
Look for ribs with a good amount of meat on the bone and some visible marbling. Avoid packages where the meat looks discolored or excessively dry.
Prepping Your Ribs for Success
There are two essential steps in preparing your ribs: removing the membrane and applying a rub.
- Removing the Membrane: On the bone side of the ribs, there’s a thin, tough membrane. If you don’t remove it, your ribs will be chewy and the rub won’t penetrate as well. We found that you can often start by prying it up with a butter knife and then pulling it off with a paper towel for better grip.
- Applying a Rub: A good rub adds flavor and helps create a delicious bark. Apply your rub generously to all sides of the ribs. Many experts suggest letting the rub sit on the ribs for at least 30 minutes, or even overnight in the refrigerator, to allow the flavors to meld.
The Smoking Process: Time to Get Smoking
Once your smoker is stable and your ribs are prepped, it’s time to introduce them to the smoke.
Initial Smoke Session: Building Flavor
Place your ribs directly on the grates of your preheated smoker. Make sure there’s good airflow around them. This initial phase is all about building that deep, smoky flavor. Keep your temperature steady between 225-275°F. We typically aim for 2-3 hours in this phase.
Don’t be tempted to open the lid too often! “If you’re lookin’, you ain’t cookin’,” as the old saying goes. Every time you open the lid, you lose heat and humidity, which can extend your cooking time and impact moisture.
The “Texas Crutch” (Foil Wrap): Moisture Lock-In
After the initial smoke, it’s time for the “Texas Crutch.” This involves wrapping your ribs tightly in foil. This step creates a steamy environment around the ribs, tenderizing them and preventing them from drying out during the middle portion of the cook.
We typically wrap after about 2-3 hours, or when the ribs have a nice bark and color. Some pitmasters add a splash of apple juice, cider vinegar, or even a pat of butter to the foil before sealing it. This adds a little extra moisture and flavor.
Place the wrapped ribs back on the smoker for another 2 hours or so, maintaining the same temperature. You’re basically steaming them now, which breaks down those tough connective tissues.
Finishing Strong: The Unwrapped Phase
After their foil sauna, your ribs need one last stint on the smoker to firm up and allow any sauce to set.
Unwrap and Finish
Carefully unwrap the ribs after their time in the foil. If you’re planning to sauce them, now is the time. Apply a thin layer of your favorite BBQ sauce. We recommend going light at first, as too much sauce can hide the delicious smoky flavor you’ve worked so hard to achieve.
Return the unwrapped (and possibly sauced) ribs to the smoker for another 30-60 minutes. This allows the sauce to caramelize slightly and for the bark to firm up again. Keep an eye on them to prevent burning, especially if your sauce has a high sugar content.
Knowing When They’re Done: The Tenderness Test
This is arguably the most crucial part of avoiding dry ribs. You cook to tenderness, not strictly to time or temperature alone. Ribs are done when they are tender, but not falling apart.
The Bend Test
Gently pick up a rack of ribs with tongs in the middle. If they are done, the rack should bend significantly, and the meat should start to crack on the surface. If they are stiff, they need more time. If they break completely, they might be overcooked, but often still delicious!
Another indicator: the meat should have pulled back from the ends of the bones by about a quarter of an inch. When you bite into them, the meat should pull away cleanly from the bone without being tough or mushy.
Resting Your Ribs: The Final Touch
Just like any other cut of meat, ribs benefit greatly from a rest before slicing. This allows the juices to redistribute throughout the meat, resulting in a more tender and juicy bite.
After removing them from the smoker, let your ribs rest for at least 15-20 minutes, loosely tented with foil. Your patience will be rewarded with even more succulent ribs.
Quick Checklist for Juicy Ribs
Here’s a summary to keep you on track for perfectly moist, tender ribs:
- Keep it low and slow: Maintain consistent temperatures between 225-275°F.
- Use a water pan: Always add humidity to your smoker.
- Remove the membrane: This makes a big difference in texture.
- Don’t peek often: Every time you open the lid, you lose heat.
- Utilize the foil wrap: The “Texas Crutch” is your friend for tenderness.
- Cook to tenderness: Use the bend test, not just the clock.
| Phase | Approximate Time | Temperature Range | Key Action |
|---|---|---|---|
| Initial Smoke | 2-3 hours | 225-275°F | Apply rub, build bark, add smoke flavor. |
| Foil Wrap (Texas Crutch) | 2 hours | 225-275°F | Tenderize, retain moisture, break down connective tissue. |
| Unwrap & Finish | 30-60 minutes | 225-275°F | Firm up bark, set sauce, achieve final tenderness. |
| Rest | 15-20 minutes | Off smoker | Redistribute juices for maximum tenderness. |
Conclusion
Achieving perfectly juicy, tender smoked ribs isn’t just a dream; it’s a completely attainable goal when you follow these steps. By focusing on consistent low temperatures, adding essential moisture with a water pan, and knowing when to apply the “Texas Crutch,” you’re setting yourself up for success. We found that patience and attention to these key details truly make all the difference.
Now, go fire up your smoker! Apply what you’ve learned today, and get ready to impress your friends and family with ribs that are the envy of every backyard BBQ.
Frequently Asked Questions
How can I tell if my ribs are getting dry during the smoking process?
Keep an eye on the surface of your ribs; if they look leathery or very dark too early in the cook, they might be drying out. Also, check the moisture in your water pan to ensure it hasn’t evaporated completely. A reliable probe thermometer will confirm your smoker’s internal temperature is staying low and steady.
Can I use apple cider vinegar instead of water in the water pan?
Absolutely! Many pitmasters use apple cider vinegar, apple juice, or even beer in their water pans. These liquids add a subtle extra flavor to your ribs while still providing the crucial humidity needed to prevent drying. Experiment to find your favorite!
What if my smoker doesn’t have a built-in water pan?
No problem at all! You can easily place a disposable aluminum pan filled with hot water directly on the lower grate of your smoker, below the ribs. Make sure it’s large enough to last for a few hours without needing a refill too often.
Is it okay to open the smoker lid to check on the ribs?
Try to resist opening the lid too frequently, especially during the first few hours. Every time you open it, you lose heat and humidity, which can extend cooking times and potentially dry out your ribs. Use your temperature probes and trust the process.
My ribs still came out a bit dry; what did I do wrong?
The most common culprits for dry ribs are temperatures that are too high or not enough moisture. Double-check your smoker temperature with a reliable probe thermometer. Ensure your water pan stayed full, and consider wrapping your ribs a bit earlier or for a longer period during your next smoke session.