How to Use a Rib Rack?
On this page (7 sections)
Using a rib rack is a simple way to cook more ribs at once, whether you’re smoking, grilling, or baking. It helps hold your ribs upright, allowing heat to circulate evenly around each piece. This means you can cook a larger batch of delicious ribs for your next backyard barbecue without taking up too much grill space.
A rib rack essentially acts as a stand for your ribs. It’s designed to keep them from lying flat and touching each other or the grill grates. This not only saves valuable cooking real estate but also ensures your ribs get a beautiful, consistent bark all around. Many pitmasters swear by them for achieving perfectly cooked, fall-off-the-bone ribs every time.
- Rib racks hold ribs upright for even cooking.
- They allow heat to circulate better around the meat.
- This method helps you cook more ribs simultaneously.
- It leads to a more consistent bark on all sides.
Ready to get the most out of your next rib cookout? Let’s break down exactly how to use a rib rack to achieve barbecue perfection.
Mastering the Rib Rack for Your BBQ
So, you’ve got a rib rack, and you’re wondering what’s next? You’re in the right place. Using a rib rack is one of the easiest ways to improve your rib-cooking game. It’s not complicated, but knowing a few tricks can make a big difference. We’ll guide you through every step.
Think of your rib rack as a helping hand. It’s designed to make your life easier and your ribs taste better. Let’s get your ribs cooked to perfection!
Choosing the Right Rib Rack for Your Needs
Before you start cooking, you need the right tool. Rib racks come in various shapes and sizes. Some are made of stainless steel, while others are coated. Many people find stainless steel to be durable and easy to clean.
Material Matters: Stainless Steel vs. Coated Racks
When you’re picking out a rib rack, you’ll see a few common materials. Stainless steel racks are a popular choice. They tend to be very durable and don’t rust easily, which is great for outdoor cooking. They can handle high heat without warping.
You might also find racks with a non-stick coating. These can be easier to clean initially. However, some users have reported that the coating can chip or peel over time, especially with repeated high-heat cooking. Always check product reviews to see what other cooks are saying.
Size and Capacity: How Many Ribs Can You Fit?
Rib racks are designed to hold a certain number of rib racks. Some smaller racks might hold two or three full racks of ribs. Larger, more heavy-duty racks can often accommodate four or even five racks. Consider how many people you usually cook for.
If you’re often feeding a crowd, a larger rack is a smart investment. It means you can cook more ribs all at once. This saves you time and grill space. Think about your typical BBQ size when making your choice.
Preparing Your Ribs for the Rack
Getting your ribs ready is just as important as the cooking itself. Proper preparation ensures the ribs fit well on the rack and cook evenly. Don’t skip this step!
Trimming and Prepping Your Ribs
First, you’ll want to remove the membrane from the back of your ribs. This thin, tough layer can prevent smoke and seasonings from penetrating the meat. It also makes the ribs less tender. You can usually lift a corner of the membrane with a knife and peel it off with a paper towel for grip.
Once the membrane is off, it’s time for your rub. Apply your favorite rib rub liberally. Make sure to coat all sides of the ribs. This is where you build a lot of that delicious flavor.
How to Position Ribs on the Rack
This is the core of using a rib rack. You’ll place your seasoned ribs so they stand upright, bone-side down. The rack has slots or bars that the ribs rest between. This keeps them from falling over and ensures each side gets direct exposure to the heat and smoke.
When placing the ribs, make sure they aren’t too tight. You want a little space between them for air to flow. Even air circulation is key to great ribs. If they are too crowded, the heat won’t get to all the surfaces evenly.
Can You Cut Ribs Before Putting Them on the Rack?
Yes, you absolutely can! If you’re cooking spareribs or St. Louis-style ribs, you might find it easier to cut them into smaller, manageable sections. Think about two or three ribs per section. This can make them fit better on certain racks and can be easier to handle.
Cutting them also means you can fit more sections onto the rack. It’s a great way to maximize your cooking space. Just be sure to cut between the bones. Don’t cut through the bones themselves.
Cooking Your Ribs with a Rib Rack
Now for the fun part: the cooking! Using a rib rack on your grill or smoker is straightforward. The main goal is consistent heat and airflow.
Grilling or Smoking with a Rib Rack
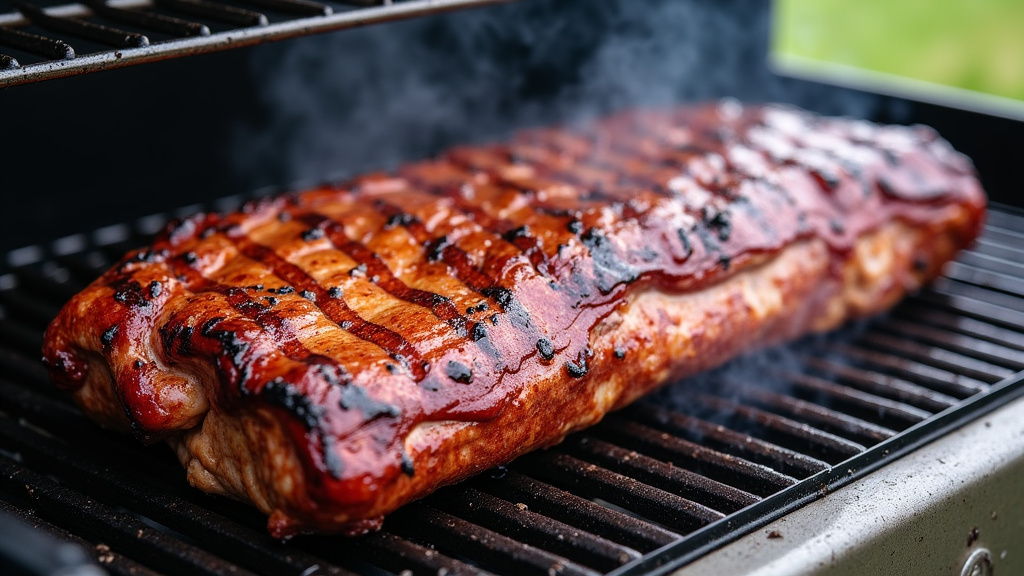
When using a smoker, place the rib rack on the cooking grate. The upright position allows smoke to curl around every piece of meat. This is fantastic for smoke penetration. If you’re using a charcoal grill, you can place the rack directly on the grates over indirect heat. For gas grills, set up your burners for indirect cooking and place the rack in the cooler zone.
Many pitmasters find that this method enhances smoke flavor. The ribs aren’t lying flat, which can sometimes lead to uneven smoking. The rack ensures a more uniform smoke bath for all your ribs. We found that monitoring the internal temperature is still essential.
Baking Ribs on a Rack in the Oven
Don’t have a grill or smoker? No problem! A rib rack works wonders in your oven too. Place the rack on a baking sheet. This catches any drips, which is super helpful for cleanup. Then, place your ribs upright in the rack.
Baking ribs on a rack helps them cook more evenly in the oven. You can often achieve a crispier exterior than if they were just laid flat on a pan. This method gives you that nice bite you’re looking for.
Managing Temperature and Cooking Time
The cooking time will vary based on your method (smoking, grilling, baking) and the temperature you’re using. A good starting point for smoking or grilling ribs is often around 225-275°F (107-135°C). In the oven, you might cook them at 300-350°F (150-175°C).
We found that ribs are typically done when they are tender. A common test is the “bend test” – when you lift the rack, the ribs should bend easily without breaking. Also, check the internal temperature. Many experts suggest an internal temperature of around 195-203°F (90-95°C) for tender, fall-off-the-bone ribs (National Pork Board).
Tips for the Best Ribs Using a Rack
Beyond the basic steps, a few extra tips can make your ribs truly exceptional. These are the little things that separate good ribs from great ribs.
Don’t Overcrowd the Rack
We’ve mentioned this, but it bears repeating. Giving your ribs space is vital. Overcrowding leads to steaming rather than roasting or smoking. This means you won’t get that beautiful, crispy bark. Ensure air can circulate freely between each rack of ribs.
Consider a Water Pan for Moisture
Especially when smoking or grilling, a water pan can help maintain moisture in your cooking environment. Place a pan filled with water, apple juice, or apple cider vinegar on the bottom rack of your smoker or grill. This adds humidity and helps keep the ribs from drying out. Many competition cooks swear by this method (Virtual Weber Bullet).
Wrapping Ribs for the “Texas Crutch”
If you want to speed up the cooking process and ensure maximum tenderness, you can wrap your ribs in foil or butcher paper during the cook. This is often called the “Texas Crutch.” Once the ribs have developed a good bark (usually after 2-3 hours of cooking), you can remove them from the rack, wrap them tightly, and put them back on the grill or in the oven. This braises them in their own juices.
After wrapping, they usually need another 1-2 hours. Once they’re tender, you can unwrap them for the last 15-30 minutes to re-crisp the bark if needed. This is a common technique for achieving that melt-in-your-mouth texture.
Resting Your Ribs is Crucial
Just like any great piece of meat, ribs benefit from a good rest after cooking. Once they’re done, take them off the heat and let them rest for at least 10-15 minutes. You can even rest them loosely tented with foil. This allows the juices to redistribute throughout the meat, making them more moist and tender when you cut into them.
We found that skipping the rest can result in juices running out onto the cutting board, leaving you with drier ribs. Patience pays off when it comes to resting meat.
Cleaning Your Rib Rack
After you’ve enjoyed your delicious ribs, it’s time to clean the rack. If it’s stainless steel, you can often soak it in hot, soapy water. For stubborn, caked-on bits, a grill brush or a paste of baking soda and water can work wonders. Always dry your rack thoroughly after washing to prevent rust, especially if it’s not stainless steel.
A clean rib rack is a happy rib rack, ready for your next barbecue adventure!
Quick Checklist for Rib Rack Success
- Prepare your ribs by removing the membrane and applying your favorite rub.
- Arrange ribs upright, bone-side down, with space between them.
- Use indirect heat for smoking, grilling, or baking.
- Monitor internal temperature for doneness (around 195-203°F).
- Rest your ribs for at least 10-15 minutes before serving.
- Clean your rib rack thoroughly after use.
Conclusion
You’ve now got the know-how to use a rib rack like a pro! Remember, this simple tool is your secret weapon for cooking more ribs at once with amazing, even results. From choosing the right rack to prepping your ribs and mastering the cooking process, you’re ready to impress at your next barbecue. Don’t forget the key steps like ensuring good airflow and letting those ribs rest. Go forth and cook up some fantastic ribs!
Frequently Asked Questions
How do I know if my ribs are done when using a rack?
You can use the “bend test” by carefully lifting the rack; the ribs should bend easily without breaking. Many pitmasters also rely on an instant-read thermometer, aiming for an internal temperature of 195-203°F (90-95°C) for tender ribs.
Can I use a rib rack for baby back ribs and spare ribs?
Yes, absolutely! A rib rack is versatile and works well for both baby back ribs and spare ribs. You might find it easier to cut larger spare ribs into smaller sections to fit better on the rack.
What’s the best way to clean a rib rack after use?
For stainless steel racks, soak them in hot, soapy water and scrub with a grill brush for tough spots. For other materials, follow the manufacturer’s instructions. Always dry thoroughly to prevent rust or damage.
Why is airflow so important when using a rib rack?
Good airflow allows heat and smoke to circulate evenly around each rib. This prevents steaming and helps create a beautiful, crispy bark on all sides of your ribs, leading to a more consistent and delicious cook.
Can I place a rib rack directly on the grill grates?
Yes, you can place the rib rack directly on the cooking grates. For gas grills, ensure you’re using indirect heat by turning off burners directly below the rack. For charcoal grills, position the rack over the area without coals for indirect cooking.