How Do You Know When Ribs Are Done without a Thermometer?
On this page (11 sections)
- Knowing When Ribs Are Perfectly Cooked Without a Thermometer
- The Bend Test: A Simple but Effective Check
- The Bone Pull-Back: A Visual Cue for Doneness
- The Feel of Tender Ribs: A Tactile Check
- Checking the Internal Temperature (If You Absolutely Must)
- Putting It All Together: The Rib Doneness Checklist
- Understanding Rib Types and How They Cook
- Troubleshooting: What If My Ribs Aren't Done Yet?
- A Quick Comparison: Done vs. Undercooked Ribs
- Conclusion
- Frequently Asked Questions
You can tell when ribs are done without a thermometer by checking their internal temperature with the bend test and looking for signs of pull-back on the bone. When you lift a rack of ribs and it bends easily, without breaking, and the meat has shrunk back from the ends of the bones, they’re likely ready to eat. These visual and tactile cues are reliable indicators of perfectly cooked ribs.
Don’t worry if you’ve never used a thermometer for ribs before. Many home cooks master the art of perfectly cooked ribs using these simple techniques. Understanding the feel and look of done ribs helps you achieve that fall-off-the-bone tenderness every time. It’s all about learning to trust your senses when you’re in the kitchen.
- Check the bend: Ribs should bend easily without snapping.
- Look for pull-back: Meat should shrink away from the bone ends.
- Feel the tenderness: They should feel soft and yielding to the touch.
- Internal temp (if you *really* want to): Aim for 195-205°F (90-96°C).
Let’s walk through exactly how to check your ribs for doneness using these foolproof methods. You’ll be a rib-cooking pro in no time!
Knowing When Ribs Are Perfectly Cooked Without a Thermometer
You’ve prepped your ribs, seasoned them up perfectly, and they’ve been on the grill or in the oven. Now comes the moment of truth: how do you know they’re truly done without sticking a thermometer into them? It’s simpler than you might think. You can rely on a few key sensory cues. We’re talking about touch, sight, and a little bit of feel. These methods have been used by pitmasters and home cooks for generations. They’re tried and true ways to achieve that melt-in-your-mouth tenderness.
The goal is ribs that are tender but not mushy, juicy but not undercooked. Getting there without a thermometer means paying close attention to your ribs. Let’s look at the signs that tell you your ribs are ready for prime time. These are the skills that will make you a rib-cooking rockstar.
The Bend Test: A Simple but Effective Check
The bend test is your first line of defense. It’s a quick way to gauge the overall tenderness of your ribs. Imagine you’re gently bending a fresh ruler. Ribs that are done will have a similar flexibility. They’ll bend easily, almost like a bow.
Performing the Bend Test Correctly
To do this, carefully lift one end of the rack of ribs using tongs. Let the rack sag downwards. If the meat is cooked through and tender, the rack will bend. It should bend significantly without any signs of cracking or breaking. Think of it as the ribs telling you they’re ready to relax. If the rack snaps or feels stiff, they need more time.
Research suggests that when collagen in the ribs breaks down into gelatin, the meat becomes more tender and flexible. This is precisely what the bend test is measuring. A rack that bends freely indicates that this collagen breakdown is complete. This means your ribs are likely tender and juicy.
What a Stiff Rack Means
On the flip side, if you lift the ribs and they feel rigid, or if they break at a joint when you try to bend them, they are not yet done. The connective tissues are still tight. They need more cooking time to soften up. Just give them a bit longer and check again.
The Bone Pull-Back: A Visual Cue for Doneness
Another fantastic visual indicator is bone pull-back. This refers to the meat shrinking away from the ends of the bones. It’s a sign that the ribs have rendered properly and are cooked to perfection. You’ll see small slivers of bone becoming exposed at the ends.
Understanding Bone Pull-Back
As ribs cook, the meat contracts. This contraction pulls away from the bone. When you see this happening, it means the meat has reached a tender stage. It’s no longer tightly bound to the bone. This creates a more pleasing texture and makes the ribs easier to eat. You can often see this pull-back on both the ends of the rack and along the length of individual bones.
Many barbecue enthusiasts consider bone pull-back a hallmark of well-cooked ribs. It’s a visual cue that tells you the fat and connective tissues have rendered beautifully. This process contributes to that desirable melt-in-your-mouth texture. It’s a sign that the cooking has gone deep into the meat.
When to Worry About Bone Pull-Back
While some pull-back is good, excessive pull-back can sometimes indicate overcooking. If the meat has pulled back so much that it looks dry and shrunken around the bones, you might have gone a bit too far. The key is moderate pull-back. It should expose just a little bit of bone, not a large section.
The Feel of Tender Ribs: A Tactile Check
Your sense of touch is also a powerful tool when determining rib doneness. Once you’ve done the bend test, you can also gently probe the meat. Done ribs will feel soft and yielding. They’ll have a slight give when you press them.
How to Gauge Tenderness with Your Fingers
Carefully pick up a rib from the rack. Gently squeeze the meat between two bones. If it feels soft and gives way easily, it’s a good sign. It should feel tender, not rubbery or firm. Imagine pressing a piece of cooked chicken breast; it has a certain softness. Ribs should have a similar yielding quality when cooked.
Some pitmasters will even use the “toothpick test.” Insert a toothpick or skewer into the meat between two bones. If it goes in with very little resistance, almost like piercing butter, your ribs are likely done. This test is a fantastic way to feel the tenderness deep within the meat. It confirms that the collagen has broken down nicely.
What Firmness Indicates
If the meat feels tough or resistant when you press it, it needs more time. The connective tissues haven’t softened enough. Don’t be afraid to keep them cooking and check again in 20-30 minute intervals. Patience is key when cooking ribs.
Checking the Internal Temperature (If You Absolutely Must)
While the goal is to avoid a thermometer, sometimes you might be curious or just want extra confirmation. If you do choose to use a thermometer, there’s a target range. For pork ribs to be perfectly tender and safe to eat, they generally need to reach an internal temperature of 195°F to 205°F (90°C to 96°C) (USDA).
Where to Insert the Thermometer
Insert the thermometer probe sideways into the thickest part of the meat. Make sure you avoid hitting any bones. The bone can give a false reading. You want to measure the actual temperature of the meat itself. Wait for the reading to stabilize before deciding.
Understanding Thermometer Readings
If your thermometer reads within the 195-205°F range, your ribs are almost certainly done. This range is where the magic happens – where connective tissues break down, making the meat tender and juicy. If you’re below this, they need more time. If you’re significantly above, you might be risking dry ribs.
Putting It All Together: The Rib Doneness Checklist
Here’s a quick rundown to help you remember the key signs. Keep this handy the next time you’re cooking up a rack of ribs:
- Bend Test: Lift the rack. Does it bend easily without breaking?
- Bone Pull-Back: Is the meat starting to shrink away from the ends of the bones?
- Feel: Does the meat feel soft and yielding when gently pressed between bones?
- Toothpick Test: Does a toothpick slide into the meat with minimal resistance?
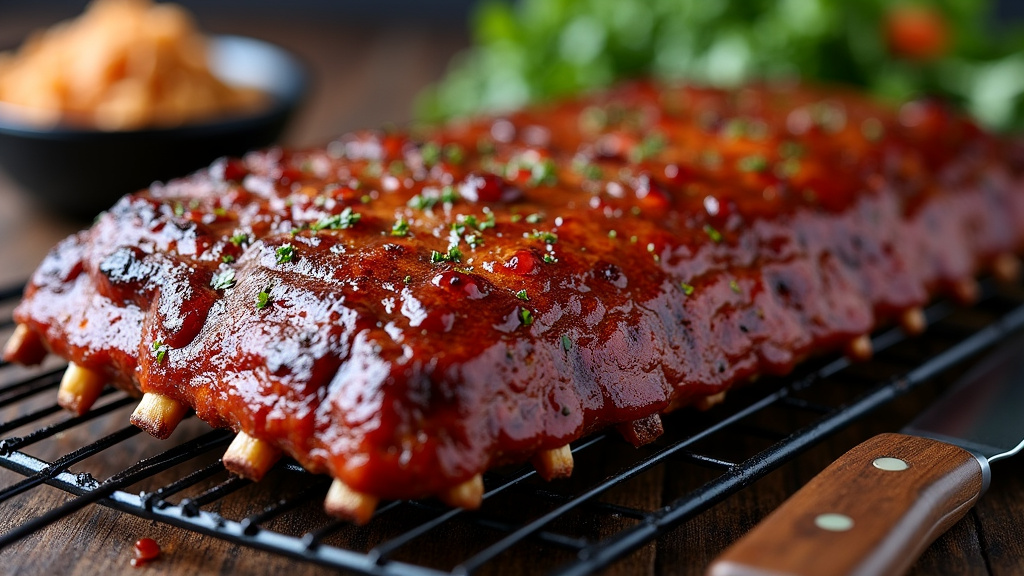
- Appearance: Does the surface of the ribs have a nice bark (if sauced or seasoned) and look caramelized?
By using these combined methods, you build a comprehensive picture of your ribs’ readiness. One single sign might be slightly ambiguous, but when they all point to “done,” you can be confident.
Understanding Rib Types and How They Cook
It’s worth noting that different types of ribs might cook slightly differently. Baby back ribs are leaner and tend to cook faster than spare ribs or St. Louis-style ribs. Spare ribs have more fat and connective tissue, meaning they usually require a longer cooking time to become tender. It’s worth noting that different types of ribs might cook slightly differently; our guide on how to smoke ribs covers these variations.
Baby Back Ribs
These ribs come from the upper part of the hog’s rib cage, near the spine. They are the shortest and leanest type of rib. Because they have less fat and connective tissue, they can become tough quickly if overcooked. They often cook faster. You’ll want to check them for doneness a bit earlier in the cooking process.
Spare Ribs and St. Louis Style
Spare ribs are larger and have more marbling and connective tissue than baby backs. This means they benefit from longer, slower cooking to break down that tissue. St. Louis style ribs are trimmed spare ribs, with the sternum bone removed and a more uniform shape. They offer a good balance of meat and fat. These larger cuts will generally take longer to reach that perfect tender stage.
Regardless of the type, the sensory checks remain the same. You’re always looking for that bend, that pull-back, and that tender feel. Just adjust your cooking time accordingly. Your nose will also tell you a lot; a wonderful aroma often signals nearing doneness.
Troubleshooting: What If My Ribs Aren’t Done Yet?
Don’t panic if your ribs aren’t quite ready when you first check. This is a common part of the cooking process. The key is to know how to bring them up to temperature without drying them out.
The Steaming Method
If your ribs are close but still a bit tough, consider wrapping them tightly in butcher paper or foil. You can even add a splash of liquid, like apple juice or broth, before sealing them. This creates a steaming environment inside the wrap. It helps to further tenderize the meat without drying it out. Return them to the heat source for another 30-60 minutes. If your ribs are close but still a bit tough, consider wrapping them tightly to tenderize them without drying them out.
Continue Low and Slow
Sometimes, ribs just need more time at a low temperature. If you’re grilling, you can move them to a cooler part of the grill or reduce the heat. If you’re in the oven, simply lower the temperature a bit. Continue to monitor them using the bend test and visual cues. It’s better to take a little longer and end up with perfect ribs than to rush and have tough ones.
A Quick Comparison: Done vs. Undercooked Ribs
Let’s summarize the differences you’re looking for:
| Indicator | Undercooked Ribs | Perfectly Done Ribs |
|---|---|---|
| Bend Test | Rigid, snaps or cracks easily | Bends easily like a bow, no cracking |
| Bone Pull-Back | Meat is flush with the bone ends | Meat has slightly pulled back from bone ends |
| Meat Feel | Firm, rubbery, resistant | Soft, yielding, tender |
| Toothpick Test | Goes in with resistance | Slides in with almost no resistance |
| Appearance | Pale, wet meat | Caramelized bark, juicy meat |
This table visually represents what you’re aiming for. Notice how each indicator moves from resistance to ease, from tightness to tenderness. You’re essentially looking for the signs that the collagen has done its job, transforming tough tissue into succulent goodness.
Conclusion
You’ve mastered the art of checking ribs without a thermometer! By trusting your senses—the easy bend test, the visual cue of bone pull-back, and the soft, yielding feel of the meat—you can confidently know when your ribs are perfectly tender and ready to enjoy. These time-tested methods ensure you achieve that delicious, fall-off-the-bone texture every time. Now, go ahead and fire up that grill or preheat that oven. Your next rack of perfectly cooked ribs awaits!
Frequently Asked Questions
How long should I expect to cook ribs if I’m not using a thermometer?
Cooking times can vary greatly depending on your method (oven, grill, smoker) and the type of ribs. Generally, expect anywhere from 2 to 5 hours. You’ll want to rely on the bend test and visual cues rather than a strict timer. Start checking around the 2-hour mark for baby backs and maybe 3-4 hours for spare ribs, then continue testing every 30 minutes.
What if my ribs look done but still seem a little tough?
If your ribs have good bone pull-back and seem to be bending well but still have a bit of firmness, they likely just need more time. Consider wrapping them tightly in foil or butcher paper with a splash of liquid, like apple cider, and return them to a low heat for another 30-60 minutes. This steaming effect helps tenderize them further without drying them out.
Can I accidentally overcook my ribs using these sensory methods?
It’s possible, but less likely than with a timer alone. The key is moderation. You’re looking for *some* bone pull-back, not a huge gap. The meat should bend easily, not shatter. If the meat feels completely mushy and falls off the bone too easily, that’s a sign you might have gone a bit too far. Continuous checking prevents overcooking.
Does the type of rib (baby back vs. spare) affect these doneness tests?
Yes, but the tests themselves remain the same. Baby back ribs are leaner and cook faster, so you’ll achieve doneness signs sooner. Spare ribs have more fat and connective tissue, requiring longer cooking times to reach that tender, bendable stage with noticeable pull-back. Always adjust your expectations for cooking time based on the rib type.
What does it mean if the meat is very sticky or gummy when I check it?
A sticky or gummy texture, especially if it feels a bit wet and resistant to the toothpick test, usually means the ribs need more cooking. This indicates that the connective tissues haven’t fully broken down into gelatin, which is what creates that tender, melt-in-your-mouth texture. Continue cooking and re-testing until it feels soft and yielding.