Grill Care: The Complete Buying Guide
The best BBQ cleaning tools depend on the surface and mess: use a soft brush for delicate cookware, a scraper for stuck residue, an ash vacuum for cold ash, and a cover for weather protection.
On this page (17 sections)
- Which BBQ cleaning tools should you buy first?
- How do you choose a grill brush?
- Should you choose a scraper or brush?
- Are bristle-free grill brushes a good choice?
- When should you use a grill stone?
- Do steam grill brushes replace scrubbing?
- What cleaner should you use on a BBQ smoker?
- How do you remove ash from a smoker?
- Do drip pans make grill cleaning easier?
- How do you care for smoker doors and seals?
- Which smoker covers protect outdoor equipment?
- What replacement parts belong in grill-care planning?
- How should you clean a grill after cooking?
- How do you store BBQ cleaning tools?
- How should you compare BBQ cleaning tools?
- Explore grill care by topic
- Final BBQ cleaning tools buying advice
The best BBQ cleaning tools match the surface and the type of residue you need to remove. Use a soft brush for indoor non-stick cookware, a scraper for stuck grate residue, a cleaner for grease, an ash vacuum for cold ash, and a cover to limit outdoor exposure.
A useful cleaning setup does not need every tool at once. Start with the grate tool that fits your cooker, then add products for the messes your routine creates most often.
This guide covers brushes, scrapers, stones, steam tools, smoker cleaners, ash vacuums, drip pans, gasket tape and covers. For a Kamado Joe Classic I, compare replacement gasket options.
It also links to the full grill-care cluster so you can move from a general buying decision to the tool that fits your cooker.
Which BBQ cleaning tools should you buy first?
Buy a grate brush or scraper first, then add tools for grease, ash and weather protection. The best starting combination depends on whether you use an outdoor grill, smoker, electric indoor grill or pellet cooker.
Use this simple order:
- Match a brush or scraper to the grate surface.
- Add a cleaner for grease that brushing cannot remove.
- Add a drip pan if grease is collecting inside the cooker.
- Add an ash vacuum if you use charcoal or a wood-burning smoker.
- Add a cover if the cooker stays outside.
- Check seals and replace worn gasket material when smoke escapes around the door.
A soft indoor brush suits appliances that have non-stick surfaces. Outdoor cookers often need a longer handle, a scraper edge or a tool designed for the shape of the grate.
The best BBQ cleaning kits can make sense if you need several basics together. A kit is less useful when it includes tools that do not match your grate or fuel type.
How do you choose a grill brush?
Choose a grill brush by bristle material, handle length, scraper shape and grate surface. A tool that works well on a heavy outdoor grate may be too hard for delicate cookware.
Soft brushes for indoor grills and panini presses
The OXO Good Grips Electric Indoor Grill and Panini Press Brush is made for air fryers, electric indoor grills, stovetop griddles and waffle makers. Its soft, flexible bristles are designed for non-stick cookware, and its silicone wiper blade helps lift grease and small food pieces from delicate surfaces.
The handle is silicone and designed to stay comfortable and non-slip when wet. Its rectangular shape measures 4.2 in long by 2.05 in wide by 10.4 in high, and it weighs 4.96 oz.
This is the wrong choice for an outdoor grill. OXO specifically excludes outdoor grills, so use it where gentle bristles and a silicone wiper matter instead.
Longer handles for outdoor cooking
A longer handle helps keep your hands farther from heat while you clean a warm grate. It also gives you more leverage when a scraper edge needs firm pressure.
The BBQ-Aid Grill Brush and Scraper for Barbecue has a 16 in wooden handle, stainless steel bristles and a replaceable stainless steel head. Its 17 in overall height and 14.9 oz weight suit outdoor grill cleaning when you want a hard brush and a separate scraper in one tool.
The brush is intended for porcelain, ceramic, infrared, Weber and Char-Broil surfaces. BBQ-Aid says it supports cleaning on hot surfaces up to 250°F, so follow your cooker and tool instructions before brushing a hot grate.
For a focused comparison, see our best grill brushes for Weber grills. If handle length is your main concern, compare best long-handle grill scrapers.
Should you choose a scraper or brush?
Choose a scraper for hardened residue and a brush for loose particles in the grate gaps. Many outdoor tools combine both because the scraper breaks up a hard layer before the brush clears the surface.
Scrapers by size and material
A small scraper is easier to store and can suit a compact grill. A longer scraper gives more reach, while stainless steel provides a firm edge for cooked-on residue.
Compare the best BBQ grill scrapers when you want one primary scraping tool. A compact cooker may be better served by one of the best small grill scrapers.
For a metal edge, review the best stainless steel grill scrapers. If you prefer a traditional tool that forms to the grate over time, see the best wooden grill scrapers.
Heavy buildup may call for a stronger tool, so compare the best heavy-duty grill scrapers. When the handle is still useful but the working edge is worn, best replacement grill scraper blades can help you replace the cutting part instead of the whole tool.
A 3-in-1 outdoor brush and scraper
The GRILLART Grill Brush Outdoor BBQ Scraper, Stainless Wire 3in1 Cleaning, 18” uses 3 rows of stainless-steel bristles and an additional scraper. The 18 in stainless steel handle gives reach, while the brush is shaped to clean grate corners and edges as well as the top surface.
GRILLART describes the bristles as thicker and balanced between stiff and flexible. The product also uses a tightly twisted wire frame, and its stated surface recommendation includes porcelain.
Its rectangular tool measures 6.7 in long by 2.8 in wide by 18 in high. Some packages require handle installation, so check the assembly before use.
This type of brush suits someone who wants one outdoor tool for brushing and scraping. It may be more tool than you need for a small grate or a cooker that requires a softer cleaning surface.
Are bristle-free grill brushes a good choice?
A bristle-free brush suits buyers who want to avoid loose wire bristles, but it may clean differently from a wire brush. You may need more passes or a separate scraper for thick, baked-on residue.
The Weetiee Grill Brush & Bristle Free Outdoor BBQ Scraper, Safe 18'' Stainless Cleaner uses a bristle-free helix design and a wide scraper. It is intended for gas, charcoal, smoker, porcelain, infrared, Weber and Foreman grill surfaces.
The handle is stainless steel and metal, while the tool measures 18 in long, 6 in wide and 3.7 in high. Weetiee describes the helix as flexible and the handle as rigid enough to resist bending during cleaning.
The manufacturer also acknowledges that bristle-free tools may not clean with the same efficiency as wire brushes. That trade-off is useful to understand before choosing one for heavy carbon buildup.
For more alternatives, compare the best bristle-free grill brushes. A nylon tool may suit a different surface and cleaning preference, so review the best nylon grill cleaning brushes.
When should you use a grill stone?
Use a grill stone when you want an abrasive block for residue on a compatible grate. Keep the stone matched to the grate material and use controlled pressure so you do not damage the surface.
The best grill cleaning stones compare stone options for cooked-on buildup. Before using one, remove loose food, follow the tool directions and keep the surface free of loose abrasive material.
Our guide explains how to use a grill stone cleaning block. The basic sequence is to warm or prepare the grate as directed, work in a controlled area, remove the loosened residue and wipe the grate before cooking.
A stone is not a universal replacement for a brush. It may be useful for hard residue, while a brush is often quicker for loose particles and grate gaps.
Do steam grill brushes replace scrubbing?
A steam brush can soften grease and residue, but it does not remove the need to match the tool to the grate. Steam also requires safe handling around hot surfaces, water and electrical equipment.
Compare the best grill cleaning brushes with steam if softened grease is your main problem. Follow the tool instructions for heating, filling and cooling, and keep water away from electrical controls unless the product is designed for that use.
Steam works best on residue that is still warm and has not hardened into a thick layer. A light film of grease often loosens faster with heat and moisture than with dry brushing alone.
That does not mean steam replaces a brush or scraper for every job. Hard carbon, rust spots and stuck food may still need a tool matched to the grate material.
Think about the surface before you choose a steam method. Porcelain coated grates, cast iron, stainless steel and non-stick indoor surfaces each respond differently to heat, water and pressure.
A gentle approach suits delicate coatings that can chip or scratch. Heavy outdoor grates often tolerate firmer brushing after residue has softened.
Set up the area before you start cleaning. Keep cloths, a safe place for the hot tool and a dry towel within reach so you are not moving around a hot cooker.
Check the cooker fuel and heat controls first. Turn the heat down or off as the maker directs, and let the grate reach a safe working temperature.
Read the instructions for filling and heating the brush. Some designs need a set amount of water, while others work with a damp pad or a short burst of steam.
Do not overfill a reservoir or add water to a hot dry part unless the maker says it is safe. Sudden steam can burn hands and can warp or crack a stressed surface.
Keep water away from plugs, control panels, igniters and other electrical parts. Outdoor cookers with electric controls need extra care because liquid can travel into places it should not reach.
Work in small sections and let the steam soften the residue for a moment. Rushing with hard scrubbing can push grease deeper into cracks instead of lifting it away.
After steaming, wipe or brush the loosened residue into a tray or a disposable cloth. The goal is to remove the softened material, not spread it across a clean area of the grate.
Rinse or wipe the brush head as the maker directs once the tool has cooled. Leftover grease and food can smell, harden and transfer to the next cleaning.
Dry the grate, the brush and the surrounding cooker parts before you cover anything. Trapped moisture can encourage rust on metal parts and can leave streaks on coated surfaces.
Steam is also not a substitute for grease control inside the cooker. Drip pans, heat shields and grease channels still need checks because softened residue can drain into hard to clean places.
Use steam as one step in a normal routine. A quick brush after cooking, a steam pass for greasy films and a deeper clean when buildup shows are easier to maintain than one large cleanup.
Store the steam brush dry and clean after it has fully cooled. If the pad, bristles or handle show damage, stop using the tool until you can check whether it is still safe for the surface.
Do not assume a steamed surface is ready for food until all loosened residue is gone. Wipe the grate once more and check for grease, carbon and loose particles before cooking again.
What cleaner should you use on a BBQ smoker?
Use a smoker cleaner for grease and smoke residue, but confirm that it suits the surfaces you plan to clean. For plug-in cabinet models, compare electric smoker cleaners.
Chemical cleaners should not leave residue on food-contact areas.
The best cleaners for BBQ smokers can help you compare products for the inside and outside of a smoker. Read the directions for contact time, rinsing and ventilation before applying anything near cooking surfaces.
A cleaner works best after loose ash and food particles are removed. Wipe or rinse as directed, then allow the cooker to dry before storing it or lighting a fire.
Do not mix cleaning chemicals. Use separate cloths for dirty exterior areas and food-contact surfaces, and keep the product container away from heat.
How do you remove ash from a smoker?
Remove ash only when it is fully cold, then use a vacuum designed for ash rather than a normal household vacuum. See ash vacuum vs shop vac for a comparison of the two cleanup options.
Fine ash can spread through a room and may damage equipment not intended for it.
The best ash vacuum cleaners are useful for charcoal grills, smokers and fire-related cleanup. Empty the ash into a suitable metal container or follow the vacuum manufacturer's disposal instructions.
A lidded ash bucket gives cold ash a dedicated place to cool and wait for disposal.
Do not vacuum glowing embers, warm ash or a recently extinguished fire. If you are unsure whether ash is cold, wait longer.
Ash also affects airflow. Remove it from the firebox and ash area as part of routine care, but avoid disturbing hot fuel or coals.
Do drip pans make grill cleaning easier?
A drip pan can catch grease before it spreads across the cooker's interior. Choose the correct shape and size, then replace or clean it before it becomes full.
The best grill drip pans can help if grease collects below the cooking grate. A pan does not remove the need to clean the grate, heat shields or grease channel, but it can reduce the amount of residue reaching those parts.
Check the pan after cooks that produce a lot of fat. A full pan can spill, smoke or create a fire risk, so handle it only when it is safe and cool enough to move.
Do not line every interior part with materials that the cooker manufacturer does not approve. Airflow and heat paths matter, especially in gas, pellet and charcoal cookers.
How do you care for smoker doors and seals?
Inspect the door seal when smoke escapes from places that should be closed. Gasket tape or a replacement seal can help restore a tighter fit when the existing material is worn or damaged.
Compare the best smoker gasket tape and door seals for this repair. Clean and dry the bonding surface first, measure the door area and apply the tape according to its instructions.
A seal does not fix every airflow problem. Check hinges, latches, vents and warped panels before assuming the gasket is the only cause.
Replacing a seal can also make the door harder to close if the material is too thick. Confirm the fit before lighting the smoker.
Which smoker covers protect outdoor equipment?
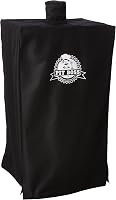
Choose a smoker cover that fits the cooker shape and leaves room for safe handling. A cover helps limit rain, sun and dirt, but trapped moisture can still cause problems if the cooker is wet when covered.
The best smoker cover is a starting point for general cover shopping. Pellet smokers often have different control panels, hoppers and chimney positions, so compare the best smoker cover for pellet smokers for that cooker type.
If you own a Pit Boss, see the best Pit Boss smoker covers. For exposed patios or severe weather, compare the best heavy-duty waterproof smoker covers.
Let the smoker cool and dry before covering it. Avoid sealing in grease, rain or condensation, and follow the cover's ventilation guidance.
What replacement parts belong in grill-care planning?
Replacement parts can keep a cooker usable when a small component wears out. Identify the exact model before buying a grate, tray, seal, controller or other part.
For electric smokers, compare the best replacement parts for Masterbuilt electric smokers. Model matching matters because similar looking parts may not fit the same cabinet or control system.
Keep a record of the smoker model and measure the old part before ordering. A replacement should solve a known fit or function problem, not become a guess based only on appearance.
Start by finding the model number and serial number on the cooker label. Those numbers usually sit on a plate near the door, the control panel or the back of the cabinet.
Write that information down with the cooker type and fuel source. A part made for a gas model may look similar to one for an electric or pellet model, yet the fit and heat rating can differ.
Measure the old part before you remove it if you can do so safely. Note the length, width, height, hole spacing and any curved shape that a flat measurement would miss.
Take clear photos of the old part from the front, the side and the mounting points. Photos help you compare the shape and can show wear that words may not describe well.
Check whether the problem is wear, damage or incorrect use. A cracked tray, a warped grate or a torn seal often points to a clear replacement.
A loose fitting may only need cleaning or adjustment.
Look for the exact replacement from the cooker maker first. That path usually gives the closest match for fit, material and heat tolerance.
If an exact part is not available, compare the maker and model details very carefully. Similar dimensions are not enough if the mounting style, thickness or heat rating does not match.
Be careful with seals and gaskets because thickness changes how a door closes. A seal that is too thick can keep the door from latching, while one that is too thin may still leak smoke.
Controllers, heating elements and electrical parts need the same exact match. Small differences in voltage, connector shape or sensor placement can make a part unsafe or unable to work.
Grate and tray parts also need surface and heat checks. A replacement should suit the cooker temperature and should not use a material that the maker has not approved for that spot.
Clean the mounting area before fitting the new part. Old grease, ash and residue can stop a part from seating flat and can make a good replacement look like a poor fit.
Test the fit before you light the cooker. The part should sit securely, allow the door to close and leave airflow paths clear.
Keep the old part until the replacement has been tested for a direct comparison.
Store model details, measurements and photos with your grill care notes. The next replacement will be faster and safer when the sizes and model numbers are already recorded.
Do not force a part that does not fit. A forced fit can bend a tray, crack a seal or put stress on a controller mount.
If you cannot confirm the match, pause and check the maker guidance.
How should you clean a grill after cooking?
Clean the grate while residue is still easier to loosen, then complete a deeper clean when buildup becomes visible. Always wait for the surface and fuel system to reach a safe temperature before handling tools or ash.
- Close or control the fuel according to the cooker instructions.
- Brush or scrape loose food from the grate.
- Use a soft brush, stone or cleaner suited to the surface.
- Empty cold ash from the firebox or ash pan.
- Check the drip pan and grease path.
- Wipe away loosened residue.
- Dry removable parts before storing them.
- Inspect the brush for damage before the next cook.
The right tool depends on the grate. A soft indoor brush is appropriate for non-stick cookware, while an outdoor stainless brush or bristle-free scraper may better suit a heavy grate.
Do not use a hard scraper on a surface that can scratch easily. If you are uncertain, choose the gentler tool and check the cooker care instructions.
How do you store BBQ cleaning tools?
Store cleaning tools dry, clean and away from food preparation areas. Rinse or wipe away grease, then allow the tool to dry before placing it in a drawer, cabinet or covered outdoor storage box.
Inspect wire brushes for loose or damaged bristles. Check scrapers for sharp edges, cracked handles and bent parts, and replace a tool when it no longer cleans safely.
Keep cleaners closed and labeled. Store them away from heat, children and food, and use separate cloths for chemical cleaning and everyday grate wiping.
A cover protects the cooker, but tools also need protection. Wet brushes and dirty cloths can transfer residue back onto a clean grate.
How should you compare BBQ cleaning tools?
Compare each tool by surface compatibility, residue type, reach and cleanup method. A tool that solves one problem may be a poor choice for another.
Choose a soft brush for indoor non-stick surfaces. Choose a long outdoor brush when heat and reach matter, a scraper for hard residue, a bristle-free tool when loose wire is a concern, and a stone when abrasive cleaning suits the grate.
Add a smoker cleaner for grease and smoke film, an ash vacuum for cold ash, a drip pan for grease collection and gasket tape when a seal needs repair. A cover protects against weather but does not replace cleaning.
The four product boxes above show the main brush trade-offs. OXO is for indoor delicate surfaces, BBQ-Aid combines a long wooden handle with stainless bristles and a scraper, GRILLART adds 18 in reach and a 3-in-1 stainless-wire design, and Weetiee removes wire bristles while keeping a scraper.
Explore grill care by topic
- Best BBQ Grill Brushes
Final BBQ cleaning tools buying advice
Choose OXO for an indoor grill, panini press, waffle maker or non-stick cookware. Choose BBQ-Aid for an outdoor grate when you want a wooden handle, stainless bristles, scraper and replaceable head.
Choose GRILLART when an 18 in stainless handle and 3-in-1 brush design suit your outdoor cleaning routine. Choose Weetiee when a bristle-free helix and wide scraper matter more than wire-brush speed.
For the wider care setup, pair the grate tool with the cleaner, ash vacuum, drip pan, seal or cover that matches your cooker. The best BBQ cleaning tools are the ones that fit the surface, the residue and the way you cook.
Frequently asked questions
What BBQ cleaning tools do I need first?
Start with a grill brush or scraper matched to your grate, a cloth or paper towel for loose residue, and a safe degreaser for greasy buildup. Add an ash vacuum for cold ash and a cover if the cooker sits outdoors.
The right set depends on your grill surface and fuel type.
Are wire grill brushes safe to use?
Wire brushes can remove stubborn residue quickly, but inspect the brush and grate before cooking because loose bristles can become a safety concern. Choose a bristle-free, nylon or stone tool if you prefer to avoid loose metal bristles, and match the tool to the grate material.
Can I use the same cleaner on a grill and smoker?
Not always. A cleaner made for a smoker may suit grease and smoke residue, while a soft brush is better for delicate indoor cookware.
Read the cleaner directions, keep chemicals away from food-contact surfaces unless approved, and remove all residue before cooking.
How often should I clean BBQ grates?
Brush loose residue after each cooking session, then do a deeper clean when grease, carbon or food buildup becomes visible. Ash should be removed only after it is fully cold.
Covers, drip pans and seals also need regular checks because neglected parts can affect airflow and cleanup.
Do BBQ smokers need covers?
A cover can help protect an outdoor smoker from rain, sun and dirt, but it does not replace cleaning or drying. Choose a cover that fits the smoker's shape, then remove it or allow ventilation as the cover instructions require to limit trapped moisture.