
How to Trim a Brisket for Smoking?
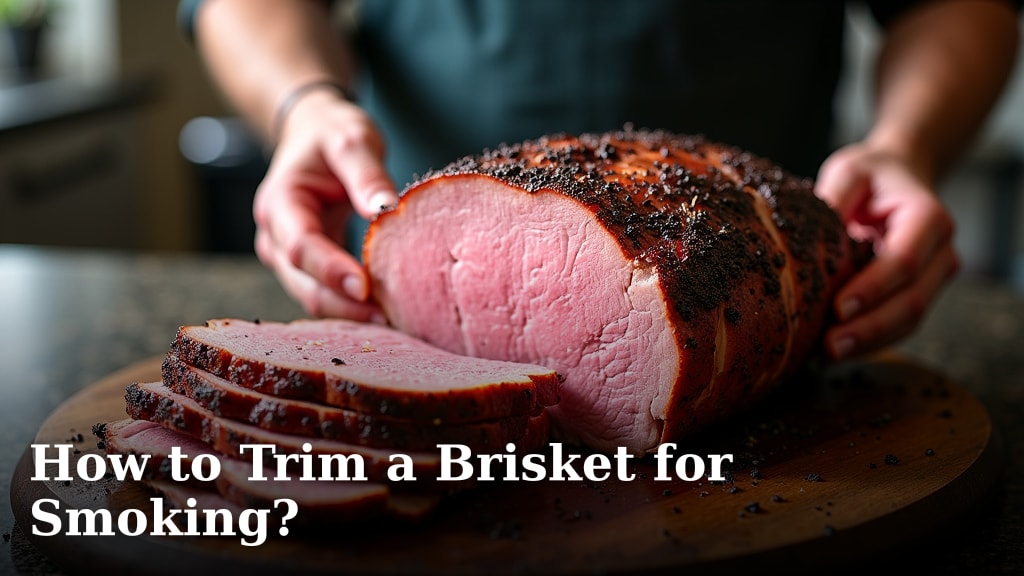
The easiest way to trim a brisket for smoking is to remove hard fat, silver skin, and thin or ragged edges. This helps ensure a better bark and even cooking. You want to shape the brisket to roughly the size and shape of a football.
Nobody wants a dry, chewy brisket with uneven doneness, right? We found that proper trimming makes a huge difference in the final product. It helps render the fat correctly and prevents those annoying burnt bits.
- Remove all hard fat and silver skin.
- Trim thin edges to prevent burning.
- Shape the brisket like a football.
- Leave a thin layer of soft fat (about 1/4 inch).
- Separate the point and flat if cooking hot and fast. Our guide on the best temperature to smoke brisket can help you decide if cooking hot and fast is right for you.
Let’s walk through exactly how to trim your brisket like a pro, step by step.
Getting Your Brisket Ready for the Knife
Proper preparation before you start trimming makes the whole process smoother. It ensures you have the right tools and your brisket is ready for its transformation.
Gather Your Essential Tools
Before you even unwrap that beautiful piece of meat, gather your gear. Having everything at arm’s reach prevents frustration. It’s like a surgeon preparing for an operation – precision matters!
- Sharp Boning Knife: This is your most important tool. A flexible blade around 6 inches works best for navigating contours.
- Large Cutting Board: You need plenty of space. A board with a juice groove is a bonus.
- Gloves (Optional but Recommended): Nitrile gloves keep your hands clean and give you a better grip.
- Sheet Pan or Tray: Keep your trimmings organized. Some folks save them for rendering into tallow.
- Paper Towels: For quick clean-ups.
Temperature Matters: Chilling Your Brisket
Working with a cold brisket is much easier. Why? The fat is firmer and less slippery. This allows for cleaner, more precise cuts.
We found that a brisket straight from the fridge is ideal. If it’s been sitting out, pop it back in for 30-60 minutes. You want the fat to be firm, but not frozen solid. Imagine trying to cut jelly versus a firm block of butter – the butter is much more manageable.
The Anatomy of a Brisket: Point vs. Flat
Understanding the different parts of the brisket helps you know what to trim and why. It’s not just one big slab of meat; it has distinct sections with different characteristics.
The Flat: Lean and Uniform
The flat is the larger, leaner section of the brisket. It’s often where you get those perfect slices for sandwiches. It has less fat marbled throughout but usually has a fat cap on top.
Its uniform shape makes it great for even cooking. Many people aim for a perfect “slice” from the flat. It’s the consistent part of the brisket.
The Point: Fatty and Flavorful
The point is the thicker, fattier end. It sits on top of the flat and has a significant fat cap and intramuscular fat. This section is incredibly flavorful and often used for burnt ends.
The grain of the meat in the point runs differently than the flat. This distinction is key for slicing later. You’ll notice it’s much less uniform in shape.
The Fat Layer Between (The Deckle)
Between the flat and the point is a thick layer of hard fat, often called the deckle. This is the primary culprit for uneven cooking if not addressed. It’s dense and doesn’t render well.
You’ll often hear experienced pitmasters talk about removing this. It’s a key step for ensuring tenderness and flavor across the whole brisket.
The Trimming Philosophy: Why We Trim
Why do we spend all this time with a knife? It’s not just for aesthetics. Every cut serves a purpose, contributing to a better smoked brisket.
Promoting Even Cooking
Irregular shapes and thick fat pockets cause parts of the brisket to cook faster or slower. Thin edges burn, while thick sections might stay undercooked. Trimming creates a more uniform shape, leading to a more consistent cook. Think of it like shaping clay – you want a smooth, even surface.
Improving Bark Formation
The bark is that delicious, crusty exterior we all love. Excessive fat prevents the rub from adhering to the meat. By trimming the fat cap to an even, thin layer, you allow smoke and rub to penetrate and create a superior bark.
Enhancing Flavor and Texture
Hard, rubbery fat and silver skin are not pleasant to eat. Removing them improves the overall eating experience. Leaving a thin layer of soft, pliable fat, however, adds moisture and flavor as it renders. It’s a balance – too much fat can be greasy, too little can be dry.
Step-by-Step Brisket Trimming Guide
Now, let’s get down to business. Follow these steps methodically, and you’ll be trimming like a seasoned pro in no time.
Step 1: Remove the Hard, Inedible Fat
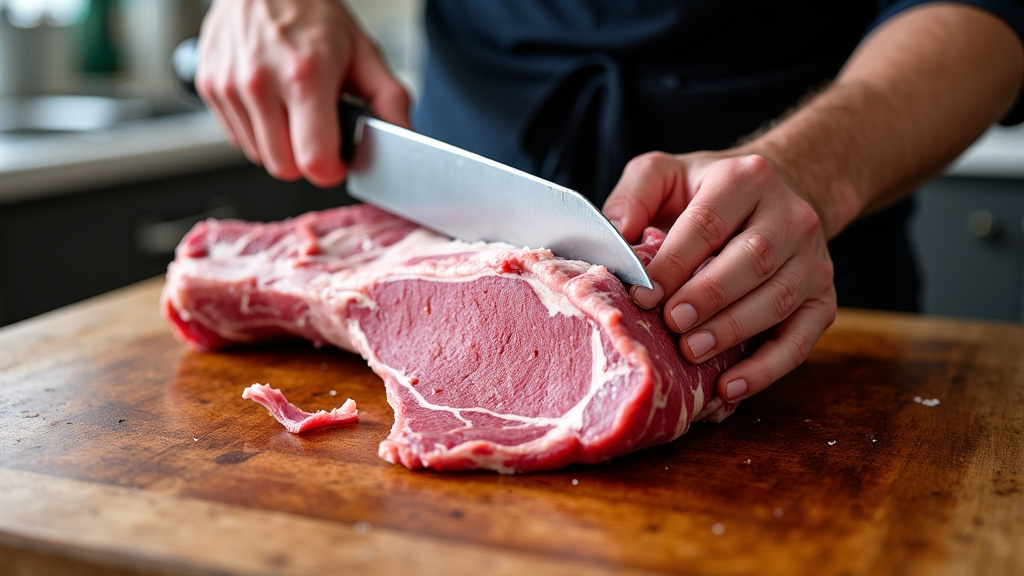
Start by identifying large, hard chunks of fat. These are usually found on the underside (meat side) and often surround the deckle area. Use your boning knife, keeping it flat against the meat, and carefully slice these large pieces away. You’re aiming for anything that feels firm and waxy. This fat won’t render well and will just be chewy.
Step 2: Address the Fat Cap on the Flat
Turn the brisket so the fat cap is facing up. You want to leave about 1/4 inch of soft, pliable fat over the flat. This fat will render down, adding moisture and flavor. Use your knife almost parallel to the meat, taking off thin layers at a time. It’s better to take off too little and go back than to take off too much. Feel the fat; it should have a slight jiggle, not be rock hard.
Step 3: Shape the Point and Remove Excess Fat
The point often has very thick, irregular fat. Trim this down to about 1/4 to 1/2 inch. You’ll also want to round off any sharp edges or corners here. The goal is to create a more aerodynamic shape, like a football or an oval. This helps with airflow in the smoker and prevents edges from burning.
Step 4: Trim the Thin and Ragged Edges
Look for any thin flaps of meat or fat that extend beyond the main body of the brisket. These will undoubtedly burn and dry out during a long smoke. Use your knife to round off these edges. Don’t be afraid to be aggressive here; a little loss of meat is worth avoiding burnt, crispy bits that nobody wants.
Step 5: Scrape Off Silver Skin
Silver skin is that shiny, thin, silvery membrane often found on the lean side of the brisket. It’s tough, doesn’t render, and can create a chewy bite. Hook the tip of your knife under an edge of the silver skin, lift it, and then slice it away, keeping your knife flat against the meat. It often comes off in strips. You want to remove as much of this as possible (USDA says removing connective tissue improves tenderness).
Step 6: “Sculpt” the Brisket into an Aerodynamic Shape
This is where you bring it all together. Stand back and look at your brisket. Do you see any major inconsistencies in thickness? Are there any sharp corners? Your goal is a uniform, aerodynamic shape. Many pitmasters aim for a smooth, rounded profile, often compared to a football or a surfboard. This helps with airflow and even heat distribution in the smoker.
Here’s a quick checklist to make sure you’ve hit all the main points:
- Hard fat removed?
- Fat cap on flat ~1/4 inch?
- Point fat trimmed and rounded?
- Thin edges removed?
- Silver skin scraped?
- Overall shape rounded and aerodynamic?
To Separate or Not to Separate: Point from Flat
This is a common question, and the answer often depends on your cooking method and end goal.
Keeping Them Together (Traditional Method)
For most low-and-slow smoking, keeping the point and flat attached is standard. This allows the fat from the point to render into the flat, adding moisture and flavor. You’ll usually separate them after the cook when slicing. This is the classic approach for a whole brisket.
Separating for Hot and Fast or Specific Cuts
If you’re cooking hot and fast, or if you specifically want to make burnt ends from the point without overcooking the flat, separating them before the cook can be beneficial. It allows you to cook each piece to its optimal doneness. To separate, find the fat seam between the point and the flat and carefully cut along it with your knife. This will expose two distinct pieces.
| Method | Pros | Cons |
|---|---|---|
| Keep Together | Moister flat, traditional cook | Point might finish before flat |
| Separate | Optimal control over doneness for each part, easier to make burnt ends | Less fat renders into the flat |
Most beginners will find it easier to keep them together. You can always separate them after the cook before slicing.
Conclusion
Trimming your brisket might seem like an extra chore, but it’s a critical step for a truly exceptional smoked brisket. We’ve found that these careful cuts ensure your bark is amazing, your cook is even, and every bite is tender.
You’re not just removing fat; you’re shaping your masterpiece for optimal results. Grab your sharp knife, keep your brisket cold, and approach it with confidence. Your efforts will be rewarded with a juicy, flavorful brisket that will impress everyone.
Frequently Asked Questions
What’s the ideal thickness for the fat cap on a brisket?
You’re aiming for about 1/4 inch of soft, pliable fat over the flat. This layer renders down during the smoke, adding moisture and flavor without making the brisket greasy.
Can I save the brisket trimmings? What can I do with them?
Absolutely! Many pitmasters save their trimmings. You can render them down to make beef tallow, which is excellent for cooking or even making candles. Fatty trimmings can also be ground for burgers or sausage.
How do I know if I’ve removed enough silver skin?
Silver skin is tough and doesn’t render. You’ll want to remove as much of it as possible. If you see shiny, silvery patches on the lean side, keep trimming. It’s better to remove a little extra than to leave chewy bits.
Should I trim the brisket right before smoking or can I do it ahead of time?
You can trim your brisket up to 24-48 hours in advance. After trimming, pat it dry, apply your rub, and store it uncovered in the refrigerator. This allows the rub to work its magic and helps dry the surface for a better bark.
What if I accidentally trim off too much fat? Will my brisket be dry?
If you accidentally trim off too much fat from the cap, don’t panic. Your brisket might be slightly less moist, but it can still be delicious. You can try basting it more often during the cook or wrapping it sooner to retain moisture.
