
How to Smoke Pulled Pork?
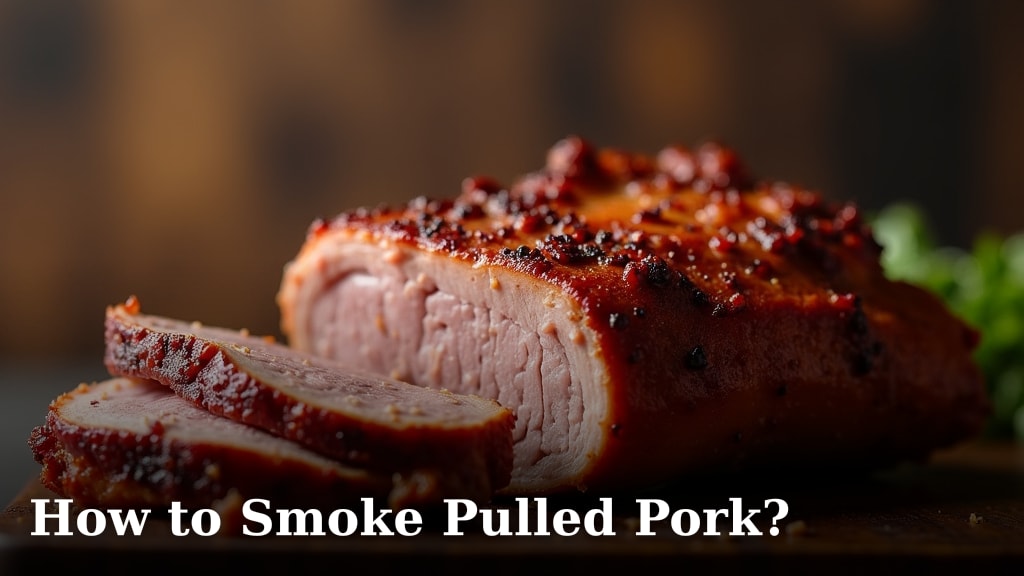
To easily smoke pulled pork, you’ll need to choose the right cut of meat, prepare it with a good rub, and then smoke it low and slow until it’s incredibly tender. This process makes the meat easy to shred and full of delicious flavor.
Making great pulled pork isn’t super hard, but it does take some patience and a few key steps. We found that a good smoker setup and monitoring your meat’s temperature are critical for success. You want that perfect smoky bark and juicy, fall-apart texture.
TL;DR
- Pick a pork butt or shoulder.
- Apply a flavorful dry rub generously.
- Smoke at a consistent low temperature (around 225-275°F).
- Cook until the internal temperature reaches 200-205°F and it probes like butter.
- Rest the meat before shredding for maximum juiciness.
Are you ready to transform a simple cut of pork into a barbecue masterpiece? Let’s walk through exactly how to smoke pulled pork, step by delicious step.
Preparing Your Pork for the Smoker
Smoking pulled pork starts long before the meat hits the grates. The right preparation ensures a juicy, smoky, and unbelievably tender result. We found that attention to these early steps really makes a difference.
Choosing the Right Cut of Pork
For the best-pulled pork, you’ll want a cut from the shoulder of the pig. This area is rich in fat and connective tissue, which breaks down during the long smoking process to create that signature tenderness. It’s what gives pulled pork its incredible texture.
Pork Butt vs. Pork Shoulder
When you head to the butcher, you’ll likely see two main options: pork butt (Boston butt) and pork shoulder (picnic roast). Both come from the shoulder, but they’re slightly different. We found most people prefer the pork butt for pulled pork.
- Pork Butt: This cut comes from the upper part of the shoulder. It’s often rectangular or square and has a good amount of marbling and a large bone. Its shape makes it easier to handle and provides a consistent cook.
- Pork Shoulder: This cut includes the lower part of the shoulder, down to the leg. It’s typically bonier and has a thick skin. While it still makes good pulled pork, many find the bone and skin a bit more work.
So, our recommendation? Go with a pork butt, ideally between 7-10 pounds. This size is manageable and yields plenty of delicious pulled pork for your family and friends. A larger cut generally means more surface area for that delicious smoky flavor.
Trimming Your Pork Butt
Before you season, a little trim is in order. You don’t want to remove all the fat, as fat equals flavor and juiciness. But some fat will just render away into your smoker, creating less-than-ideal ash. We found a balanced approach works best.
- Fat Cap: Most pork butts have a thick layer of fat on one side. You’ll want to trim this down to about 1/4 to 1/2 inch thick. This allows the smoke to penetrate the meat while still providing moisture. Some people score the fat cap in a crosshatch pattern.
- Silver Skin: Look for any shiny, silvery membrane on the other sides. This “silver skin” is tough and won’t break down during cooking. Remove it using a sharp knife; it’s easier to grip if you slide the knife under it and slice upwards.
- Loose Bits: Trim off any really thin or scraggly pieces. These would just burn or dry out during the long smoke. You want a relatively uniform shape for even cooking.
Don’t be afraid to get in there with a sharp knife. A little extra effort now pays off big time in the end product. You’re aiming for a nice canvas for your seasoning.
Applying Your Dry Rub
The rub is where a lot of the flavor comes from! This seasoned crust becomes your “bark” later. You can buy pre-made rubs, or many people enjoy making their own. We found that a simple blend of savory, sweet, and a little heat is a winner. Many recipes suggest a mix of salt, pepper, paprika, garlic powder, onion powder, and a touch of brown sugar.
- Generous Application: Don’t be shy! Apply the rub liberally over all surfaces of the pork butt. Use your hands to really press it into the meat. Think about coating every crevice. We’re talking a full, even layer.
- Resting Time: Once rubbed, you have options. Most pros recommend letting the pork sit, or “rest,” with the rub on.
To Rest or Not to Rest?
This is a common question. We found a few schools of thought here:
Some people apply the rub right before smoking. This is fine if you’re short on time. Others prefer to rub the pork and then refrigerate it for 4-12 hours, or even overnight. This allows the salt to start drawing out some moisture, then reabsorbing the seasoned liquid, leading to a deeper flavor (Science of Cooking). We’ve seen great results with both methods, but an overnight rest can definitely deepen the flavor profile.
If you choose to rest it, make sure it’s uncovered in the fridge or loosely covered so the rub can dry out a bit. This helps form that beautiful bark. Remember to bring it out of the fridge about an hour before smoking to let it come up closer to room temperature.
Smoking Your Pork Butt: Low and Slow Method
This is where the magic happens! The phrase “low and slow” is key here. You’re not trying to cook it fast. You’re coaxing out flavor and tenderness over many hours. We found that patience is your most important tool in this stage.
Setting Up Your Smoker
The type of smoker you use doesn’t matter as much as maintaining a consistent temperature. Whether it’s a pellet smoker, offset smoker, electric smoker, or charcoal smoker, the goal is the same. Aim for a smoking temperature between 225°F and 275°F. We found 250°F to be a good sweet spot for many.
- Temperature Stability: The most important thing is to keep your temperature steady. Big temperature swings can affect the cook time and the final texture.
- Wood Choice: What wood should you use? For pork, fruitwoods like apple and cherry work wonderfully, giving a milder, sweet smoke. Oak and hickory are stronger, providing a more classic BBQ flavor. Try mixing them!
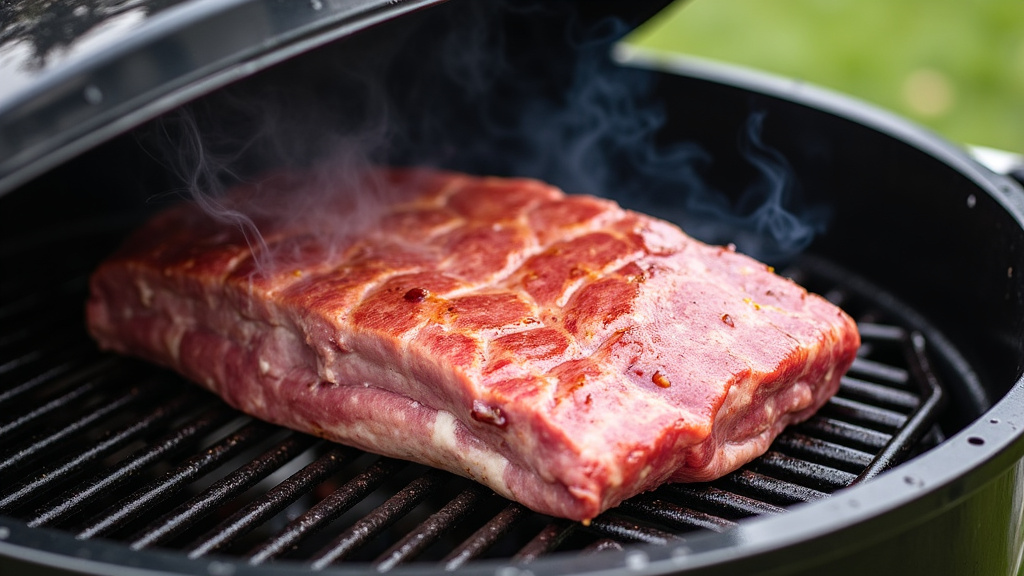
Don’t just fill your smoker with wood and walk away. That will likely make your meat bitter. You want a “thin blue smoke” – almost invisible, with a sweet aroma. Thick, white smoke means incomplete combustion and can lead to a less pleasant taste. Many experts recommend adding wood chunks every hour or so, rather than all at once (BBQ & Grilling Association).
The Smoking Process: Timing and Temperature
Place your prepared and seasoned pork butt directly on the grates, fat cap up if you trimmed it that way. Close the lid and let the smoke do its work! You’ll primarily be cooking to temperature, not time, but here’s a general guideline we’ve found useful.
| Stage | Internal Temperature | Process |
|---|---|---|
| Initial Smoke | ~150-160°F | Smoke for 4-6 hours. This is where the bark sets and maximum smoke flavor is absorbed. |
| The Stall | ~150-170°F | Temperature *stops* rising for several hours. Moisture evaporates, cooling the meat. Be patient! |
| Wrapping (Optional) | After the stall | Wrap in foil or butcher paper. Helps power through the stall, tenderize, and retain moisture. |
| Final Cook | 200-205°F | Cook until internal temp reached "probe tender" stage. |
Monitoring Temperature and The Stall
A good leave-in thermometer is your best friend here. Insert the probe into the thickest part of the meat, avoiding the bone. You’ll notice the temperature slowly climb. Then, it will likely stop rising, sometimes for hours. This is called “the stall.” Don’t panic! This is normal. It happens as moisture evaporates from the surface, cooling the meat, much like sweat cools your body.
You can power through the stall by simply waiting patiently. Or, many people opt to “wrap” the pork in foil or butcher paper once it hits around 160-170°F. This method helps push through the stall by preventing further evaporation, while trapping moisture. We often wrap when the bark looks great and the color is where we want it.
Keep your smoker temperature consistent. You are aiming for a final internal temperature of 200-205°F. However, don’t rely solely on temperature! The real sign of done-ness is tenderness.
Checking for Doneness: Probe Tender
Once your meat reaches 200-205°F, start checking for “probe tender.” This means inserting your thermometer probe (or a skewer) into the meat. It should slide in with very little resistance, like putting a hot knife through butter. Many professionals say this is the most critical part. Your meat should feel like jelly with no firmness remaining.
If it’s not probe tender at 205°F, give it another 30 minutes and check again. Each cut is different, and some might need a little more time to fully break down that connective tissue.
The All-Important Rest and Shred
You’re almost there! Once your pork butt is probe tender, take it off the smoker. This next step is non-negotiable if you want juicy pulled pork. Seriously, don’t skip it.
- The Rest: Wrap the pork butt tightly in foil, and then wrap it in a towel. Place it in a cooler (without ice) for at least 1-2 hours. We found 2-3 hours offers the best results. This resting period allows the juices to redistribute throughout the meat, making it incredibly moist. If you shred it too early, those juices will just run all over your cutting board.
- The Shred: After resting, unwrap your pork. The bone should pull out cleanly with a small tug. Use two forks, bear claws, or your (gloved) hands to pull the meat apart. It should be incredibly tender and shred easily. Remove any large pieces of fat that haven’t rendered down. Mix the shredded pork with any accumulated juices from the wrapping.
Season to taste, add a little barbecue sauce if you like, and prepare for a chorus of appreciative “Mmmms.”
Your Pulled Pork Checklist
To recap, here’s a quick checklist to ensure your smoked pulled pork is a success:
- Pork butt (Boston butt) selected.
- Trimmed fat and silver skin to about 1/4 inch thickness.
- Generously applied dry rub and allowed adequate rest.
- Smoker stabilized at 225-275°F with thin blue smoke.
- Pork cooked to 200-205°F *and* is probe tender.
- Rested for at least 1-2 hours before shredding.
Conclusion
You now have all the tools and knowledge to smoke incredible pulled pork. Remember, patience with the low and slow process is key. From selecting the right pork butt to understanding the “stall” and that all-important rest, each step builds on the last to create barbecue perfection. Don’t be afraid to experiment with your favorite rub and wood combinations.
Get ready to impress your friends and family with juicy, tender, fall-apart pulled pork. Your smoker is waiting!
Frequently Asked Questions
How long does it take to smoke a 7-pound pork butt?
A 7-pound pork butt typically takes between 10-14 hours to smoke, but time can vary greatly. You should always cook to internal temperature and tenderness, not just time. The “stall” can significantly extend the cooking process.
Do I need to spray or spritz my pork butt while smoking?
Spritzing, usually with apple cider vinegar, water, or apple juice, is optional but can help keep the surface moist and promote bark development. If you choose to spritz, start after the first few hours and do it every 45-60 minutes until you wrap the meat.
What is the best wood for smoking pulled pork?
For pulled pork, many pitmasters prefer fruit woods like apple or cherry for a mild, sweet smoke. Hickory provides a stronger, traditional BBQ flavor, and oak is also a popular, versatile choice. We recommend trying different woods to find your favorite.
Can I smoke pulled pork without a dedicated smoker?
Yes, you can adapt a kettle grill or a gas grill to smoke pulled pork. You’ll need to set it up for indirect heat and use a smoke box or foil pouch with wood chips to generate smoke. Maintaining a consistent low temperature will be your biggest challenge.
How do I store leftover pulled pork and can I freeze it?
Leftover pulled pork can be stored in an airtight container in the refrigerator for 3-4 days. For longer storage, it freezes exceptionally well. Portion it into freezer-safe bags or containers and it will last for 2-3 months. Thaw in the fridge overnight before reheating.
