
How to Smoke Beef Ribs?
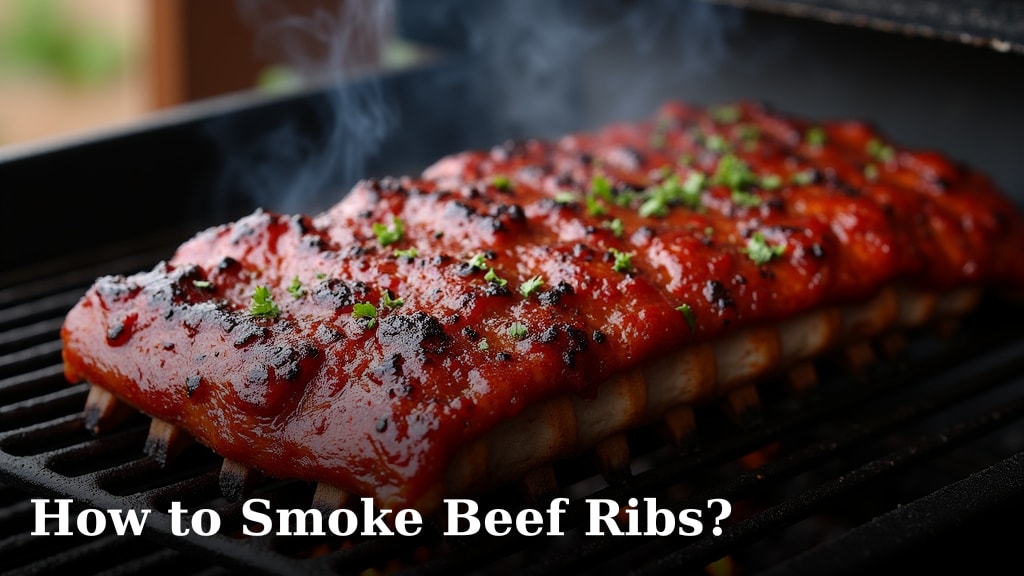
The easiest way to smoke beef ribs is to maintain a consistent low temperature in your smoker, typically around 250°F, and smoke them until they reach an internal temperature of 203°F for tender, fall-off-the-bone results. This process usually takes 6-8 hours, but we found it’s best to cook to temperature, not time.
Smoking beef ribs transforms a tough cut of meat into a succulent, flavorful masterpiece. It’s an art form many pitmasters perfect over time. You might think it’s complicated, but with the right steps, you can achieve perfectly smoked ribs every time. We’ve done the research to simplify it for you.
- Prepare your beef ribs by trimming excess fat and applying a rub.
- Set up your smoker for indirect heat and maintain a steady temperature.
- Smoke the ribs until they develop a beautiful bark and reach the target temperature.
- Rest the ribs properly before slicing for maximum juiciness.
- Enjoy your perfectly smoked beef ribs!
Ready to impress your friends and family with your BBQ skills? Let’s walk through exactly how to smoke beef ribs step by step, so you can achieve that amazing smoked flavor and texture you crave.
Smoking Beef Ribs: Your Step-by-Step Guide
Smoking beef ribs is a rewarding cooking experience. You’ll transform a tough cut into something incredibly tender and delicious. We found that breaking it down into simple steps makes it much easier.
Choosing the Right Beef Ribs
Not all beef ribs are created equal for smoking. You want to pick the right kind to get the best results. The type of rib greatly affects the final texture and flavor.
Types of Beef Ribs for Smoking
There are two main types of beef ribs you’ll typically find at the butcher or grocery store. Knowing the difference is key to your success.
- Beef Short Ribs: These come from the plate section of the cow. They are meaty, often with a thick layer of fat and connective tissue. Short ribs can be cut into individual pieces or left as a plate. We found that leaving them as a plate gives you the best smoking experience because they retain more moisture.
- Back Ribs: These are found closer to the spine, similar to pork back ribs. They have less meat on top of the bone compared to short ribs. They are still delicious, but often require a slightly different cooking approach.
For this guide, we’ll focus on beef short ribs (plate ribs), as they are what most people think of when smoking “beef ribs.” They offer that incredible, rich beefy flavor and texture. Many experts say a good plate of beef short ribs is the king of smoked beef (USDA).
What to Look For When Buying
When you’re at the butcher, take a moment to inspect the ribs. A little attention here goes a long way.
- Meat-to-Bone Ratio: Look for ribs with plenty of meat on top of the bone. This ensures a juicy, satisfying bite.
- Marbling: Good marbling (flecks of fat within the meat) is crucial. This fat renders down during smoking, adding flavor and keeping the meat moist.
- Color: The meat should have a vibrant, fresh red color. Avoid anything discolored or grayish.
- Size: A rack of three or four bones is ideal. Each bone should be substantial, often 8-12 inches long.
Preparing Your Beef Ribs for the Smoker
Preparation is a critical step that sets the stage for amazing ribs. Don’t skip these steps; they make a big difference.
Trimming Your Ribs
Trimming might seem daunting, but it’s straightforward. You’re just removing what won’t taste good after smoking.
- The Fat Cap: On the top side of the ribs, you’ll often find a thick layer of fat. We found that trimming this down to about 1/4 inch is ideal. Too much fat can prevent bark formation, and too little can dry out the meat.
- Silverskin: On the underside of the ribs, there’s a thin, silvery membrane called silverskin. This doesn’t break down during cooking and can be tough. Use a knife or a spoon handle to pry it up, then peel it off with a paper towel for a better grip. It might take a bit of effort, but it’s worth it.
- Loose Bits: Trim off any thin, hanging pieces of meat or fat. These will just burn during the long smoke.
Think of trimming as sculpting. You’re shaping the ribs for their best possible presentation and taste. Many pitmasters agree that proper trimming is a secret weapon.
Applying Your Rub
A good rub adds flavor and helps create that desirable “bark” on the ribs. Don’t be shy with your seasoning.
- Oil Binder: We found that a thin layer of mustard or a neutral oil (like olive or avocado) helps the rub stick. It also helps with bark formation.
- Seasoning generously: Apply your rub liberally to all sides of the ribs. Don’t be afraid to really coat them. The rub forms a protective, flavorful crust.
- Your Rub Choice: A simple rub often works best for beef ribs. Think coarse salt, black pepper, garlic powder, and onion powder. Some people add a touch of paprika for color. There are also many great pre-made beef rubs available if you prefer convenience.
- Resting with Rub: Once rubbed, let the ribs sit in the refrigerator for at least 2-4 hours, or even overnight. This allows the rub to penetrate the meat slightly and helps develop the bark.
This is where you can really personalize your ribs. Do you prefer a classic salt and pepper or something with a bit more kick? The choice is yours!
Setting Up Your Smoker for Beef Ribs
Your smoker setup is crucial for maintaining a consistent temperature. Consistency is the name of the game for tender ribs.
Achieving the Right Temperature
For beef ribs, a low and slow approach is best. We found that a temperature range of 250°F to 275°F works perfectly. This allows the connective tissues to break down slowly.
- Indirect Heat: Always use indirect heat in your smoker. This means the heat source isn’t directly under the meat, preventing burning and promoting even cooking.
- Temperature Control: Use a reliable thermometer to monitor your smoker’s temperature. Don’t just rely on the dome thermometer, as they can often be inaccurate. An external probe is a wise investment.
Wood Choice and Smoke Flavor
The type of wood you use will impart different smoke flavors to your ribs. This is where you can get creative. For more detailed information on selecting the best wood for smoking ribs, consult our comprehensive guide.
- Stronger Woods: For beef, many experts prefer stronger woods like oak, hickory, or mesquite. These woods complement the rich beef flavor without overpowering it.
- Milder Options: If you prefer a lighter smoke, apple or cherry wood can also be used. You can even mix and match for a unique flavor profile.
- Amount of Wood: You don’t need a lot of wood. A few chunks are usually enough for the entire smoke. Too much smoke can make the ribs bitter.
Remember, the goal is a gentle kiss of smoke, not an overpowering cloud. We often use a blend of oak and a bit of cherry for a balanced flavor.
The Smoking Process: Low and Slow
This is where the magic happens. Patience is your best friend during this stage.
Monitoring Temperature and Bark Development
Once the ribs are in the smoker, try to avoid opening the lid too often. “If you’re looking, you’re not cooking,” as the saying goes.
- Initial Smoke: For the first 3-4 hours, just let the ribs smoke. Don’t spray or wrap them yet. This is when the bark starts to form, and the smoke flavor penetrates the meat.
- Visual Cues: Look for a rich, dark mahogany color to develop on the surface. This is your bark, and it’s a sign of good things to come.
The “Wrap” or “Texas Crutch” Method
Wrapping the ribs helps them power through the “stall” and keeps them incredibly moist. We found this step to be a game-changer.
- When to Wrap: Wrap your ribs when they reach an internal temperature of about 160-170°F, or when the bark has formed to your liking.
- How to Wrap: Use heavy-duty aluminum foil or butcher paper. Place a little liquid (like beef broth, apple juice, or even a little butter) in the wrap with the ribs. This creates a steamy environment that tenderizes the meat. Wrap them tightly to prevent steam from escaping.
- Why Wrap?: Wrapping helps break through the “stall,” a period where the meat’s temperature plateaus. This is due to evaporative cooling. Wrapping also keeps the ribs super moist and speeds up the cooking process.
Many pitmasters swear by the butcher paper method, claiming it allows for a better bark, but foil works wonderfully too. We’ve had success with both.
Cooking to Temperature, Not Time
This is the most important rule for smoking ribs. Time is just a guide; temperature is your true indicator.
- Target Temperature: For fall-off-the-bone tenderness, aim for an internal temperature of 203°F. This allows the collagen and connective tissues to fully break down.
- Probe Tender: The best way to check for doneness is the “probe tender” test. Insert a thermometer probe into the thickest part of the meat (avoiding the bone). It should slide in with very little resistance, like pushing into warm butter.
- Total Cook Time: Beef short ribs usually take 6-8 hours total, but sometimes longer. Back ribs might be a bit quicker, around 4-6 hours. Be patient!
Don’t rush it. The extra time is worth it for perfectly tender, melt-in-your-mouth ribs.
Resting and Serving Your Smoked Beef Ribs
You’ve done all the hard work. Don’t mess it up now by skipping the rest!
The Importance of Resting
Resting allows the juices in the meat to redistribute, ensuring every bite is incredibly moist.
- How to Rest: Once the ribs reach your target temperature and are probe tender, remove them from the smoker. Leave them wrapped, or re-wrap them in a fresh piece of foil. Then, wrap them in a towel and place them in an insulated cooler (without ice) for at least 30-60 minutes, or up to 2 hours.
- What Happens: During the rest, the internal temperature might even rise a few degrees (carryover cooking), and the muscle fibers relax, reabsorbing the juices.
Skipping the rest is like running a marathon and not cooling down. The results just won’t be as good. We found that a good rest is almost as important as the smoke itself.
Slicing and Enjoying Your Masterpiece
The moment you’ve been waiting for! It’s time to carve and savor your efforts.
- Carefully unwrap the ribs. There will be delicious juices in the foil – don’t discard them!
- Place the ribs on a cutting board.
- Slice the ribs between the bones.
- Serve immediately with your favorite sides.
Imagine the look on your friends’ faces when they see these perfectly smoked, glistening beef ribs. It’s a truly satisfying moment.
Troubleshooting Common Beef Rib Issues
Even seasoned pitmasters run into challenges. Here are a few common issues and how to fix them.
My Ribs Are Dry
Dry ribs are a common complaint, but usually avoidable.
- Overcooked: You might have cooked them too long or at too high a temperature. Remember the probe tender test!
- Insufficient Fat: Next time, choose ribs with more marbling.
- No Wrap: If you didn’t wrap, try doing so next time. The steamy environment helps retain moisture.
My Ribs Are Tough
If your ribs are tough, they haven’t cooked long enough. This is the opposite of dry ribs.
- Undercooked: The connective tissues haven’t fully broken down. They need more time in the smoker. Don’t pull them until they are probe tender.
- Temperature Too Low: While low and slow is good, if your smoker temperature dips too low for too long, it can prolong the cook time excessively or result in tougher meat if you pull them prematurely.
Remember, cooking to temperature and tenderness, not time, is your ultimate guide. Trust your thermometer and the probe test.
Flavor Comparisons and Considerations
Here’s a quick comparison to help you understand the differences between smoking beef and pork ribs.
| Feature | Smoked Beef Ribs | Smoked Pork Ribs |
|---|---|---|
| Flavor Profile | Rich, beefy, strong umami | Sweeter, often with more distinct rub/sauce flavor |
| Texture | Often very tender, melt-in-your-mouth | Can be tender, sometimes with more chew (depending on cut) |
| Ideal Wood | Oak, Hickory, Mesquite | Apple, Cherry, Pecan |
| Target Temp |
 ConclusionYou now have all the tools and knowledge to smoke beef ribs like a seasoned pitmaster. We’ve shown you how proper selection, careful trimming, and a consistent smoking temperature are key. Remember to always cook to temperature, not time, and trust the “probe tender” test for that perfect melt-in-your-mouth texture. Don’t forget the importance of resting your ribs to lock in those delicious juices. Now, go fire up your smoker and create some unforgettable barbecue that will have everyone asking for your secret! Frequently Asked QuestionsWhat kind of smoker is best for beef ribs?You can use almost any type of smoker for beef ribs, including offset smokers, pellet grills, or even charcoal grills set up for indirect heat. The most important factor is maintaining a consistent low temperature, ideally between 250°F and 275°F. We found that a smoker you’re familiar with and can easily control the temperature on will yield the best results. Do I need to spray or spritz beef ribs while smoking?Spraying or spritzing beef ribs during the smoke is optional. Some pitmasters like to use apple cider vinegar, beef broth, or water to keep the surface moist and help with bark formation. We found that wrapping the ribs effectively maintains moisture, making frequent spritzing less critical for great results. Can I use sauce on my smoked beef ribs?Absolutely! While properly smoked beef ribs are delicious on their own, you can certainly add your favorite barbecue sauce. We recommend applying sauce in the last 30-60 minutes of cooking if you want it to set and caramelize. Alternatively, you can serve the sauce on the side for dipping. How do I store leftover smoked beef ribs?To store leftover smoked beef ribs, let them cool completely. Then, wrap them tightly in aluminum foil or place them in an airtight container. They will last in the refrigerator for 3-4 days. For longer storage, you can freeze them for up to 3 months. My ribs aren’t getting a good bark. What can I do?A good bark takes time and consistent heat. Ensure your rub is applied generously and contains enough coarse pepper and salt. Avoid opening your smoker lid too often, especially in the first few hours. We found that not wrapping too early also helps develop that rich, dark crust you’re looking for. |
