
How to Clean Creosote from a Smoker?

The easiest way to clean creosote from a smoker is by scraping it out with a putty knife or stiff brush after the smoker has cooled. For tougher buildup, a good quality degreaser or oven cleaner can help dissolve the sticky residue. Always wear protective gear, as creosote is a nasty, tar-like substance.
You’ve probably noticed that stubborn, black film building up inside your smoker. That’s creosote, and it’s a natural byproduct of burning wood or charcoal, but too much creosote can affect the taste of your food and even become a fire hazard. Cleaning it regularly keeps your smoker safe and your barbecue tasting great, which is what we all want, right?
- Scrape away loose creosote first.
- Use a degreaser or oven cleaner for baked-on residue.
- Always protect yourself with gloves and eye protection.
- Clean your smoker regularly to prevent heavy buildup.
- A clean smoker makes for better-tasting food.
Let’s walk through exactly how to tackle this messy but important task, step by step, so you can get back to perfectly smoked meats without any worries.
Preparing Your Smoker for a Thorough Cleaning
Before you dive into the nitty-gritty of creosote removal, a little prep work goes a long way. This isn’t just about making the job easier; it’s about safety and efficiency. Taking these first steps ensures you’re ready to tackle the mess head-on without any surprises.
Gather Your Essential Cleaning Tools and Gear
Having the right tools at hand makes all the difference. You wouldn’t try to build a house with a spoon, right? Similarly, the correct cleaning supplies will cut through creosote faster and with less effort. We’ve found that a small collection of items is usually sufficient for most jobs.
Protective Equipment You’ll Need
- Heavy-duty gloves: Creosote is nasty stuff, and you don’t want it on your skin. Choose chemical-resistant gloves.
- Safety glasses or goggles: Protect your eyes from falling debris and cleaning solutions. Splashes can be dangerous.
- N95 respirator or dust mask: Creosote flakes can become airborne. Breathing them in is not good for your lungs.
- Old clothes: Seriously, wear clothes you don’t mind getting stained or ruined. This job gets messy.
Cleaning Tools for Effective Creosote Removal
- Stiff-bristled brush or wire brush: Great for scrubbing off loose and medium buildup.
- Plastic putty knife or scraper: Ideal for prying off thicker, more stubborn layers without damaging surfaces.
- Shop vacuum or dustpan and brush: For quick cleanup of loosened creosote.
- Bucket of warm, soapy water: Useful for rinsing tools and initial wipe-downs.
- Degreaser or oven cleaner: For dissolving really tough, baked-on creosote. We recommend checking your smoker’s manual for recommended cleaners (USDA).
- Heavy-duty trash bags: To collect and dispose of the creosote properly.
Cool Down and Disassemble Your Smoker
You should never try to clean a hot smoker. It’s not just uncomfortable; it’s dangerous. Always allow your smoker to cool completely before you even think about touching it. This might sound obvious, but rushing this step can lead to burns and frustration. A good rule of thumb is to wait at least a few hours, or even overnight.
Once cool, remove all removable parts. This includes grates, water pans, heat deflectors, and charcoal baskets. Cleaning these separately makes the main chamber much easier to access and clean thoroughly. Set them aside for individual attention later.
Techniques for Removing Loose Creosote Buildup
Starting with the least aggressive methods is always a good strategy. You want to remove as much dry, loose creosote as possible before moving on to the tougher stuff. Think of it like peeling an onion; you take off the outer layers first.
Scraping Away the Initial Layers
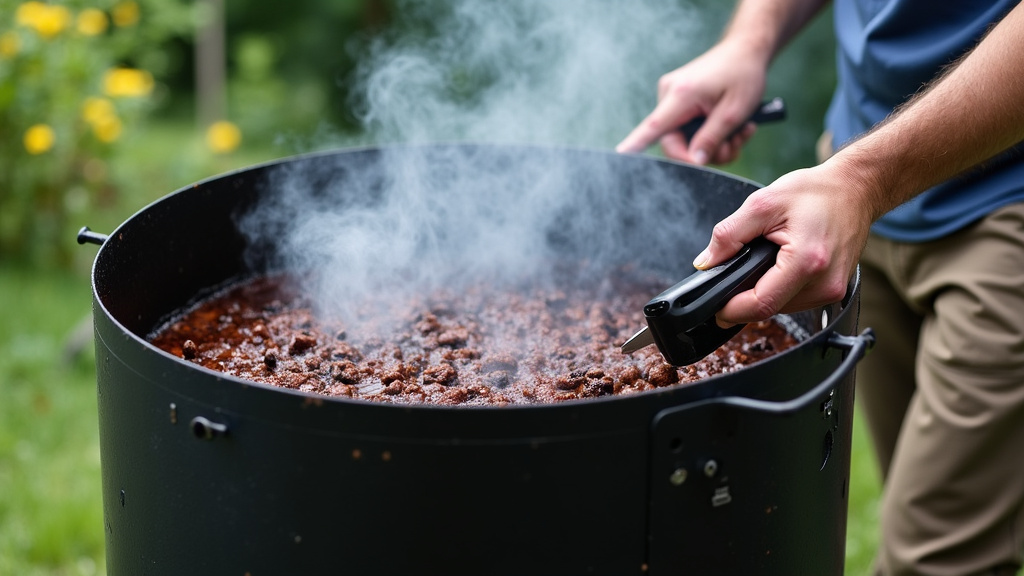
Grab your plastic putty knife or scraper. Begin by gently scraping the internal surfaces of your smoker. Focus on the walls, lid, and firebox area. You’ll likely find that some creosote comes off in large flakes or chunks. This is good! The goal here is to reduce the bulk before you start scrubbing.
Work from the top down, letting the creosote fall to the bottom of the smoker. Be careful not to gouge the metal. A plastic scraper is generally safer for painted or coated surfaces than a metal one. Many experts suggest using a soft touch at first (Good Housekeeping).
Brushing Off Remaining Debris
After scraping, use your stiff-bristled brush or wire brush to tackle the remaining loose bits. This is where you can apply a bit more pressure. Scrub in circular motions or short, firm strokes. You’ll see more flakes and dust falling. This step helps to loosen any lightly adhered creosote that the scraper missed.
Don’t forget the corners and seams. Creosote loves to hide in those tight spots. A smaller brush, like a grill brush, can be helpful for these areas. Keep working until you’ve removed all the dry, crumbly creosote you can.
Tackling Stubborn, Baked-On Creosote
Okay, so you’ve removed the easy stuff. Now it’s time for the real challenge: the sticky, tar-like creosote that seems to be glued to your smoker. This requires a bit more muscle and, often, some chemical assistance. But don’t worry, we’ve got you covered.
Using Degreasers or Oven Cleaners
For this step, you’ll need your chosen degreaser or oven cleaner. Always read the instructions on the product label carefully and make sure it’s safe for the materials of your smoker. Some cleaners can damage certain finishes. When in doubt, test a small, inconspicuous area first.
Spray the cleaner generously on the stubborn creosote spots. Allow it to sit for the recommended time, usually 10-30 minutes. This gives the chemicals time to work their magic, softening and dissolving the tar. You’ll often see the creosote start to bubble or change texture, which means it’s working.
The Power of Elbow Grease: Scrubbing and Rinsing
Once the cleaner has had time to penetrate, grab your stiff brush again. Now comes the scrubbing! Apply firm pressure and work at the softened creosote. It should come off much easier than before. You might need to reapply cleaner to particularly tough spots and let it sit longer.
After scrubbing, wipe down the surfaces with a damp cloth to remove the dissolved creosote and cleaner residue. Then, rinse thoroughly with clean water. You can use a hose for larger smokers or wet rags for smaller ones. Ensure all chemical residue is gone to prevent it from affecting your food or attracting pests.
Cleaning Removable Components and Final Touches
Remember those grates and other parts you set aside? They need attention too! Often, these parts accumulate just as much, if not more, creosote and grease. Giving them a good clean ensures your smoker is pristine from top to bottom.
Soaking and Scrubbing Grates and Trays
For grates, water pans, and heat deflector plates, a good soak can work wonders. Fill a large utility tub or bucket with hot, soapy water and add a splash of degreaser. Submerge the parts and let them soak for at least an hour, or even overnight for heavy buildup. This helps to loosen baked-on food and creosote.
After soaking, use your stiff brush or a steel wool pad to scrub them clean. Rinse thoroughly and allow them to air dry completely. Some people like to finish with a light coat of cooking oil on grates to prevent rust and season them for the next cook.
Post-Cleaning Checklist for Your Smoker
You’re almost done! Before you pack away your tools, do a quick final check. This ensures your smoker is ready for its next delicious adventure. It’s like a chef wiping down their station before calling it a night.
- Inspect all internal surfaces for any missed creosote spots.
- Ensure all cleaning product residue has been rinsed away.
- Confirm all parts are dry to prevent rust.
- Reassemble your smoker, placing grates and trays back in position.
- Consider a “burn-off” run with just wood or charcoal to season it lightly (if recommended by manufacturer).
Understanding the Dangers of Creosote Buildup
Why go through all this trouble? Because creosote isn’t just unsightly; it’s a genuine problem for your smoking experience and your health. Knowing why it’s bad helps reinforce the importance of regular cleaning. It’s not just about aesthetics.
Health Risks Associated with Creosote
Creosote is a complex mixture of chemicals, many of which are known irritants and carcinogens (Agency for Toxic Substances and Disease Registry). Inhaling creosote fumes or getting it on your skin can cause irritation. Long-term exposure, especially in high concentrations, is not something you want.
When creosote builds up in your smoker, it can flake off onto your food during cooking. While small amounts are unlikely to be acutely toxic, consistent exposure is certainly not ideal. Protecting yourself during cleaning is just as important as protecting your food from contamination.
Fire Hazards and Food Flavor Impact
Beyond health concerns, heavy creosote buildup presents two immediate problems for your smoker. First, creosote is highly flammable. A significant accumulation can ignite, leading to a dangerous grease fire inside your smoker. We’ve found that this is a common cause of smoker damage or total loss.
Second, creosote severely impacts the flavor of your food. Instead of a clean, smoky taste, your meats will develop a bitter, acrid, or even chemical taste. This is because the old, stale creosote re-vaporizes and sticks to your fresh food. It ruins all your hard work and delicious intentions. A clean smoker provides a clean smoke profile.
Preventative Measures to Reduce Creosote Formation
The best defense is a good offense, right? While you can’t eliminate creosote entirely, you can significantly reduce its buildup with a few smart habits. This means less cleaning time and more consistent, delicious results from your smoker.
Optimizing Your Smoking Process
| Factor | How it Affects Creosote | Best Practice |
|---|---|---|
| Wood Type | Resinous woods (pine, fir) produce more creosote. | Use seasoned, hardwood chunks or splits (oak, hickory, fruitwoods). |
| Airflow | Poor airflow leads to incomplete combustion and more creosote. | Keep dampers open to maintain a clean-burning fire. |
| Temperature | Low, smoldering fires generate more creosote than hot, clean ones. | Maintain a consistent, appropriate temperature for your cook. |
| Fuel Quality | Wet or unseasoned wood creates excessive smoke and creosote. | Always use dry, well-seasoned wood or quality lump charcoal. |
Focus on a “thin blue smoke” coming from your smoker. If you see thick, white, or acrid smoke, your fire isn’t burning clean. This thick smoke is packed with creosote and will coat your food and your smoker’s interior. Adjust your vents or fuel to get that clean, barely visible smoke.
Regular, Light Maintenance
Don’t wait until your smoker looks like a tar pit before cleaning it. A quick wipe-down or light scrape after every few cooks can prevent major headaches. It’s much easier to clean a small amount of fresh creosote than a thick, hardened layer that’s been baked on for weeks.
Empty your ash pan regularly. Excess ash can restrict airflow and contribute to dirty fires. Keeping your smoker tidy after each use is the easiest way to keep creosote at bay. Just a few minutes now can save you hours of scrubbing later.
Conclusion
Cleaning creosote from your smoker might seem like a chore, but it’s essential for both safety and flavor. You’ve learned how to tackle the toughest buildup, from scraping and brushing to using powerful degreasers. We’ve also explored the importance of protecting yourself and understanding the risks of heavy creosote accumulation.
By following these steps, you’re not just cleaning; you’re investing in better-tasting food and a safer smoking experience. Now, take these tips, grab your gear, and get that smoker sparkling clean. Your next barbecue will thank you for it!
Frequently Asked Questions
How often should I clean creosote from my smoker?
You should aim for a deep clean every 3-5 cooks, especially if you notice significant buildup. For lighter use or shorter smokes, a thorough cleaning every 10-15 cooks is usually sufficient. Regular light maintenance after each use helps extend the time between deep cleans.
Can I use a pressure washer to clean creosote from my smoker?
We generally don’t recommend using a pressure washer directly inside your smoker. While it might remove some creosote, it can damage seals, gauges, or the internal coating. It also makes rust more likely if not dried perfectly. Stick to brushes, scrapers, and appropriate cleaners.
Is creosote harmful if it gets on my food?
Heavy creosote buildup can impart a bitter, acrid taste to your food, ruining the flavor profile. While small flakes are unlikely to cause immediate harm, consistent exposure or large amounts are not healthy. It’s best to prevent it from touching your food by keeping your smoker clean.
What’s the difference between creosote and seasoning in a smoker?
Seasoning is a thin, polymerized layer of cooking oil that protects your smoker and adds to its flavor profile over time. Creosote, on the other hand, is a thick, tar-like byproduct of incomplete combustion. Seasoning is good; creosote is bad and needs to be removed.
Can baking soda and vinegar effectively clean creosote?
While baking soda and vinegar can be useful for light cleaning and odor removal, they are typically not strong enough to tackle heavy, baked-on creosote. For really stubborn buildup, you’ll need dedicated degreasers or oven cleaners as discussed in the article.
